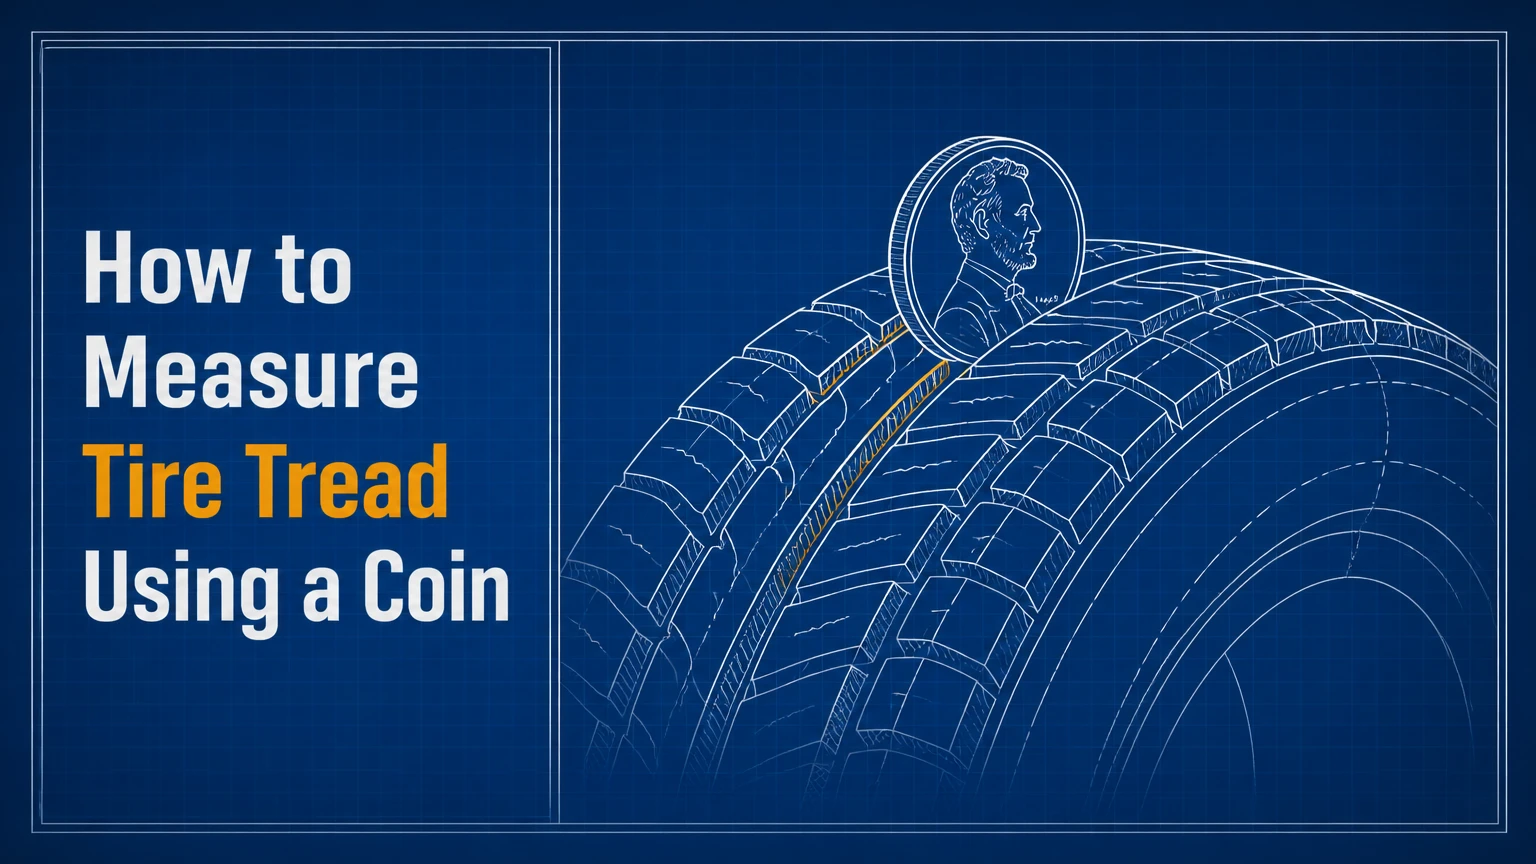
To measure tire tread using a coin, insert a U.S. penny upside down into a main tread groove with Lincoln’s head entering first. If the top of Lincoln’s head remains visible, the tread is approximately 2/32 inch or less, so the tire should be replaced. Repeat the test across and around every tire.
Key Facts at a Glance
- A penny test checks whether tread is near the 2/32-inch replacement threshold.
- A quarter test provides an approximate 4/32-inch wet-weather planning threshold.
- Coin tests estimate tread depth but do not produce an exact numerical reading.
- Every tire should be checked at its inside shoulder, center, and outside shoulder.
- A tire can pass the penny test and still be unsafe because of damage or uneven wear.
- NHTSA recommends inspecting tire tread at least monthly.
Before You Start
Measuring tire tread with a coin takes about five minutes for four tires. The task requires no mechanical experience, but accuracy depends on checking multiple grooves instead of testing one convenient location.
| Requirement | Typical amount or condition | Purpose |
| Time | 4-7 minutes | Check all four tires |
| Difficulty | Beginner | No wheel removal required |
| Cost | $0.01-$0.25 | One penny or quarter |
| Coins | 1 penny, optional quarter | Approximate 2/32 and 4/32 checks |
| Lighting | Daylight or flashlight | See the coin and groove clearly |
| Parking surface | Flat and firm | Prevent vehicle movement |
| Tire condition | Stationary and accessible | Obtain repeatable readings |
Park the vehicle on a level surface, shift into Park or first gear, engage the parking brake, and switch off the engine. For easier front-tire access, turn the steering wheel fully left or right after parking.
Do not crawl underneath a vehicle supported only by a jack. The complete coin inspection can normally be performed without lifting the vehicle.
How Does the Coin Tire Tread Test Work?
A coin test compares remaining tread with the distance between the coin’s edge and a recognizable part of its design. The test is a visual threshold check, not a precision measurement, because coin wear, viewing angle, groove shape, and manufacturing tolerances can affect the result.
The U.S. penny test uses the area between the penny’s edge and the top of Abraham Lincoln’s head as an approximate indicator of 2/32 inch. NHTSA instructs drivers to insert the penny with Lincoln’s head upside down and replace the tire when the top of his head remains visible.
A quarter is commonly used as an approximate 4/32-inch check. This deeper threshold offers more warning before the tire reaches its final usable tread. Michelin notes that wet-road braking and water-channeling ability can decline noticeably around 4/32 inch, although tire performance varies by design.
Coin markings should not be treated as exact calibrated rulers. A tread-depth gauge is required when a specific reading, such as 3/32 or 5/32 inch, will affect a replacement, inspection, fleet, or purchasing decision.
Which Coin Should You Use?
Use a penny to identify tires at the common U.S. replacement threshold. Use a quarter when you want earlier warning for frequent rain, highway travel, or seasonal replacement planning.
| Coin or method | Approximate threshold | What you observe | Recommended use |
| U.S. penny | 2/32 in, 1.6 mm | Top of Lincoln’s head | Final replacement check |
| U.S. quarter | About 4/32 in, 3.2 mm | Top of Washington’s head | Wet-weather planning |
| U.S. nickel | Roughly 5/32 in, 4.0 mm | Top of Jefferson’s head | Broad winter estimate only |
| Wear bar | 2/32 in, 1.6 mm | Bar flush with tread | Built-in replacement indicator |
| Mechanical gauge | 1/32-in increments | Number on scale | Accurate routine measurement |
| Digital gauge | Often 0.1 mm increments | Numerical display | Precise records and comparisons |
The nickel method appears in many informal guides, but its reading is less universally standardized as a tire-maintenance rule. Drivers preparing for snow should use a gauge and follow the tire manufacturer’s winter recommendations instead of depending on a nickel alone.
How to Measure Tire Tread Using a Coin Step by Step
Step 1: Inspect the Tire Before Using the Coin
Look over the complete visible tread and sidewall before measuring anything. Stop the inspection and arrange professional service if you find exposed cords, a sidewall bulge, a deep cut, separated rubber, or an object embedded near the sidewall.
Tread depth cannot confirm structural safety. A tire with 6/32 inch of tread can still be unsafe if its casing is damaged.
You will know the tire is ready for measurement when it is properly inflated, visibly intact, stationary, and accessible from both shoulders.
Common mistake: Assuming sufficient tread makes every tire roadworthy.
Step 2: Locate the Main Tread Grooves
Identify the wide channels that run around the tire’s circumference. These main grooves provide the most consistent place for a coin or gauge reading.
Avoid tiny decorative cuts called sipes. A coin may not enter them vertically, and they do not represent the main measurable tread depth.
Also locate the treadwear indicators. Wear bars are raised rubber bridges positioned inside certain grooves. NHTSA and the U.S. Tire Manufacturers Association state that these indicators correspond to approximately 2/32 inch of remaining tread.
Success checkpoint: You can distinguish the bottom of a groove from the raised wear bars crossing it.
Step 3: Insert the Penny With Lincoln’s Head Down
Hold a penny between your thumb and forefinger with Lincoln facing you. Rotate the penny so the top of Lincoln’s head points toward the tire.
Push the coin straight into the bottom of a main groove. Keep it perpendicular to the tread surface rather than tilting it toward either shoulder.
Use gentle pressure only. Forcing a coin into a narrow channel can make the tread appear deeper than it is.
Success checkpoint: The coin reaches the groove floor and stands vertically without resting on a wear bar.
Step 4: Read the Penny at Tread Level
Crouch until your eyes are nearly level with the tread surface. Look across the tread rather than down from standing height.
If the tread covers the top of Lincoln’s head, that location has more than approximately 2/32 inch remaining. If the complete top of his head is visible, the tire is around or below the replacement threshold.
NHTSA states, “If you can see the top of Lincoln’s head, replace your tires.”
A borderline result should be confirmed with a tread gauge. Coin wear, dirt, lighting, and viewing angle can easily affect a reading near the boundary.
Common mistake: Looking diagonally at the penny, which can hide or expose part of the coin design.
Step 5: Check Three Positions Across Each Tire
Measure the inside shoulder, center, and outside shoulder of every tire. This creates a minimum of three readings per tire and 12 readings for a four-tire vehicle.
| Measurement position | What it reveals | Possible concern |
| Inside shoulder | Inner-edge wear | Alignment or suspension issue |
| Center groove | Central wear | Excess pressure or tire profile |
| Outside shoulder | Outer-edge wear | Alignment, cornering, or pressure |
| Both shoulders | Edge wear on both sides | Chronic underinflation |
| Several adjacent grooves | Local irregularity | Cupping, damage, or flat spot |
The inside shoulder is often the most neglected location because it is harder to see. Turn the steering wheel to expose the front tire’s inner tread, then use a flashlight for the rear tires when necessary.
Success checkpoint: Every tire has readings from both shoulders and the center.
Step 6: Check More Than One Point Around the Tire
A tire can have acceptable tread at one point and severe wear elsewhere. Test at least two locations around the circumference, ideally separated by approximately half a rotation.
Move the vehicle forward or backward by about 2-3 feet, park securely again, and repeat the three-position check. This exposes tread that was previously touching the ground.
A complete basic inspection therefore includes at least six readings per tire: three across the width at two circumferential positions.
Common mistake: Testing only the easiest visible section and missing a flat spot or localized bald patch.
Step 7: Compare the Result With the Wear Bars
Find a wear bar in one of the main grooves and compare its height with the surrounding tread blocks. When the tread surface becomes flush with the wear bar, the groove is near 2/32 inch.
Do not place the coin directly on top of the wear bar. The coin must touch the actual groove floor, or the measurement will incorrectly suggest that no tread remains.
Wear bars and the penny test should point toward the same conclusion. If they disagree, clean the groove and confirm the depth with a dedicated gauge.
How Should You Interpret the Results?
The penny test determines whether a location is above or near the final 2/32-inch threshold. It cannot reliably distinguish intermediate values such as 3/32, 5/32, or 7/32 inch.
| Result | Approximate condition | Driving implication | Action |
| Lincoln’s head well covered | More than 2/32 in | Passes basic penny threshold | Continue monthly checks |
| Top barely covered | Near 2/32 in | Very little usable margin | Measure with gauge and plan replacement |
| Top fully visible | About 2/32 in or less | Insufficient tread | Replace the tire |
| Different results across width | Uneven wear | Reduced predictable grip | Diagnose pressure or alignment |
| Quarter fails but penny passes | Roughly 2/32-4/32 in | Legal minimum may remain, wet margin reduced | Plan replacement for rainy use |
| Wear bar flush with tread | Approximately 2/32 in | Tire is worn out | Replace promptly |
The 2/32-inch figure is a replacement threshold, not proof that the tire will perform well in every condition. NHTSA says tires are unsafe and should be replaced once tread is worn to 2/32 inch. USTMA similarly states that tread at this level requires a visit to a tire shop.
State inspection and road-use rules can differ. NHTSA has explained that tire use after retail sale is generally regulated at the state level, even though federal tire standards require treadwear indicators at 2/32 inch.
Is the Quarter Test Better Than the Penny Test?
The quarter test is better for early replacement planning, while the penny test identifies the final common U.S. threshold. Neither coin provides an exact tread-depth number.
Insert the quarter with Washington’s head pointing downward. If the top of Washington’s head remains visible, the groove is commonly treated as being below approximately 4/32 inch.
That result does not automatically mean the tire is legally worn out. It means the tire has entered a range where drivers who frequently encounter heavy rain may prefer replacement before reaching 2/32 inch.
Michelin identifies 4/32 inch as a point where wet-road braking and hydroplaning resistance can decline compared with a deeper tire. Actual performance also depends on tread design, rubber compound, water depth, speed, inflation, vehicle weight, and pavement condition.
Practical Coin Selection
- Use the penny for the final replacement threshold.
- Use the quarter for earlier wet-weather planning.
- Use a gauge when the reading affects a purchase or maintenance decision.
- Use the wear bars as a built-in confirmation.
- Use professional inspection when wear is irregular or damage is visible.
Legal Minimum Versus Practical Safety
A tire that narrowly passes the penny test may still have limited capacity to move water through its grooves. As tread becomes shallower, the available channel volume decreases, which can increase sensitivity to standing water.
The word “legal” should therefore not be interpreted as “optimal.” Driving conditions determine how much safety margin is appropriate.
A driver in a dry climate who makes short urban trips may make a different replacement decision from a driver who travels at highway speed through frequent thunderstorms. Winter driving may require even deeper tread and a winter-specific tire design.
NHTSA’s broader advice remains straightforward: check tread monthly and replace tires at 2/32 inch. Its tire-safety guidance also describes tread as the feature that supplies grip, particularly on wet or icy roads.
What Do Uneven Coin-Test Results Mean?
Uneven readings usually indicate a maintenance or mechanical problem rather than ordinary uniform wear. Confirm the pattern with a tread gauge before changing tire pressure or authorizing repairs.
| Wear pattern | Common association | What to verify | Appropriate response |
| Center lower than shoulders | Excess inflation over time | Cold pressure against door label | Correct pressure and inspect |
| Both shoulders lower than center | Underinflation or overloading | Pressure, load, leakage | Inflate correctly and check leaks |
| One shoulder lower | Alignment or worn components | Camber, toe, suspension joints | Request alignment inspection |
| Alternating high and low patches | Cupping or scalloping | Shocks, balance, bearings | Professional diagnosis |
| One localized smooth patch | Braking or mechanical issue | Wheel rotation and brake operation | Inspect before further high-speed use |
| Different tires wearing rapidly | Rotation or geometry issue | Rotation history and alignment | Service and document measurements |
These patterns are diagnostic clues, not definitive diagnoses. Center wear can also be influenced by tire construction, vehicle load, wheel width, and driving pattern.
Michelin associates wear on both outer edges with chronic underinflation and center-only wear with overinflation. USTMA notes that misalignment can cause rapid, uneven wear and recommends inspection when a vehicle pulls to one side.
Coin Test Versus a Tire Tread Gauge
A coin is suitable for quick screening. A gauge is better for tracking wear, comparing tires, documenting service decisions, and identifying small differences across a tread.
| Criterion | Coin test | Mechanical gauge | Digital gauge |
| Typical cost | $0.01-$0.25 | About $3-$10 | About $8-$25 |
| Output | Pass or fail estimate | Numerical depth | Numerical depth |
| Common resolution | Broad threshold | Usually 1/32 in | Often 0.1 mm or 1/32 in |
| Repeatability | Moderate to low | High with correct technique | High with correct technique |
| Battery required | No | No | Usually yes |
| Best use | Emergency screening | Routine home maintenance | Records and detailed comparison |
| Main limitation | Subjective reading | Scale must be read correctly | Calibration and battery condition |
To use a gauge, place its base flat across the tread blocks and push the measuring probe to the groove floor. Take the same inside, center, and outside readings used during the coin test.
A gauge is especially valuable when a tire appears to have 3/32-5/32 inch remaining. That range can affect replacement timing, but a penny cannot quantify it.
Common Mistakes and How to Fix Them
Testing Only One Groove
One reading cannot represent the complete tire. Repeat the test at the inside shoulder, center, and outside shoulder, then inspect a second circumferential location.
Placing the Coin on a Wear Bar
A wear bar sits above the actual groove floor. Move the coin several inches away and test a clear section of the same groove.
Holding the Coin at an Angle
A tilted coin enters the groove unevenly. Hold the coin perpendicular to the tread and view it at tread level.
Treating the Quarter Test as a Legal Test
The quarter test is an early-warning method, not a universal legal standard. Check applicable local rules and confirm the actual measurement with a gauge.
Ignoring the Hard-to-See Inner Shoulder
Inner-edge wear may remain hidden during a casual inspection. Turn the front wheels and use adequate lighting to examine every inside shoulder.
Lowering Pressure Based Only on Center Wear
Do not adjust inflation by appearance alone. Measure pressure when the tires are cold and use the vehicle manufacturer’s label on the driver’s door frame, not the maximum pressure molded on the tire sidewall. NHTSA specifically warns against using the sidewall maximum as the vehicle’s inflation target.
When Is Tread Depth Not the Only Problem?
Tread depth is only one part of tire safety. Replace or professionally inspect a tire when you find structural damage, recurring pressure loss, vibration, exposed internal material, or substantial age-related cracking.
Stop driving on the tire, except when necessary to reach safety, when you observe:
- A bulge or bubble in the sidewall
- Steel cords or fabric showing through the rubber
- Tread separation or a raised tread section
- A deep sidewall cut
- Severe vibration that begins suddenly
- A puncture near the sidewall or shoulder
- A tire repeatedly losing pressure
- A smooth patch that exposes the casing
NHTSA advises inspecting tread and sidewalls for cuts, punctures, bulges, scrapes, cracks, and bumps. The agency recommends taking a damaged tire to a service professional.
How Often Should You Check Tire Tread?
Check tire tread once a month, before long road trips, and whenever you notice pulling, vibration, pressure loss, or reduced wet-road grip. Monthly inspection aligns with guidance from NHTSA and USTMA.
Check more frequently when:
- The vehicle covers high annual mileage.
- The tires are approaching the quarter-test threshold.
- The vehicle frequently carries heavy loads.
- Roads contain potholes or broken pavement.
- One tire has shown irregular wear.
- The vehicle recently received suspension or alignment work.
- Wet or winter weather is approaching.
Record gauge readings by tire position when monitoring wear. For example, note left front as LF: 5/32, 5/32, 4/32, listing inside, center, and outside measurements in the same order each month.
What Can You Use Without a U.S. Coin?
Drivers without a U.S. penny should use the tire’s built-in wear indicators or purchase an inexpensive metric tread gauge. Currency-based shortcuts differ because coin dimensions and designs vary by country and can change over time.
A metric gauge provides a direct millimeter reading:
| Tread depth | Inch equivalent | General interpretation |
| 8.0 mm | About 10/32 in | Common new-tire range |
| 6.4 mm | About 8/32 in | Substantial tread remaining |
| 4.0 mm | About 5/32 in | Monitor for winter needs |
| 3.2 mm | About 4/32 in | Wet-weather planning point |
| 2.4 mm | About 3/32 in | Replacement approaching |
| 1.6 mm | About 2/32 in | Common replacement threshold |
New passenger tires commonly begin around 8/32-11/32 inch, although performance, winter, light-truck, and specialty tires may differ. Check the tire manufacturer’s original specification when calculating how much tread has been used.
Expert Rules for More Reliable Readings
First, use the same groove pattern every time. Consistent measurement positions make month-to-month changes meaningful.
Second, treat the lowest confirmed reading as the tire’s practical tread depth. An average can hide a dangerously worn inner shoulder.
Third, investigate a difference of approximately 2/32 inch across one tire. A large difference often signals pressure, alignment, suspension, or rotation problems that may shorten the life of the replacement tire.
Fourth, do not estimate remaining mileage from tread depth alone. Wear rate changes with compound, heat, pressure, alignment, load, road texture, driving style, and rotation history.
Finally, replace tires as an axle pair when appropriate and follow the vehicle or tire manufacturer’s placement guidance. Mixing substantially different tread depths can change wet handling and stability.
Frequently Asked Questions
Can I use a dime to check tire tread?
A dime is not a standard U.S. tire-tread reference because its design does not provide the familiar 2/32-inch Lincoln threshold. Use a penny, built-in wear bars, or a tread-depth gauge. A gauge is the best choice when no suitable reference coin is available.
Does passing the penny test mean my tire is safe?
Passing the penny test only indicates that the tested groove appears deeper than approximately 2/32 inch. It does not evaluate sidewall damage, tire age, inflation pressure, internal separation, uneven wear, wet performance, or every location around the tire. Complete the visual and pressure inspections as well.
Should I replace a tire at 3/32 inch?
A tire at 3/32 inch is close to the common 2/32-inch replacement threshold and has limited remaining margin. Replacement planning is reasonable, particularly before a rainy season or long trip. Confirm the depth across the entire tire and check applicable state inspection requirements.
How many places should I test on each tire?
Test at least three places across the tread: the inside shoulder, center, and outside shoulder. Repeat those readings at a second point around the circumference. Six readings per tire provide a much more reliable inspection than one center-groove measurement.
Can I measure tread while the tire is wet or dirty?
Water usually does not prevent a coin test, but mud, stones, compacted debris, and tire-dressing residue can distort the reading. Clean the selected groove and dry the coin before measuring. Use a gauge when the result appears close to the replacement boundary.
Why does one tire fail while the others pass?
One tire may wear faster because of incorrect inflation, misalignment, a damaged suspension component, missed rotation, brake drag, or a previous replacement that has a different starting depth. Measure all three zones with a gauge and have the vehicle inspected when the difference is substantial.
Conclusion
The correct way to measure tire tread using a coin is to insert a penny upside down into a clear main groove, view Lincoln’s head at tread level, and repeat the test across and around all four tires. Visible space above Lincoln’s head indicates approximately 2/32 inch or less and means the tire should be replaced.
Use a quarter for earlier wet-weather planning, but use a dedicated gauge when you need an exact number. The lowest reading matters most, and any bulge, cord exposure, severe cracking, or irregular wear requires attention regardless of how much tread remains.