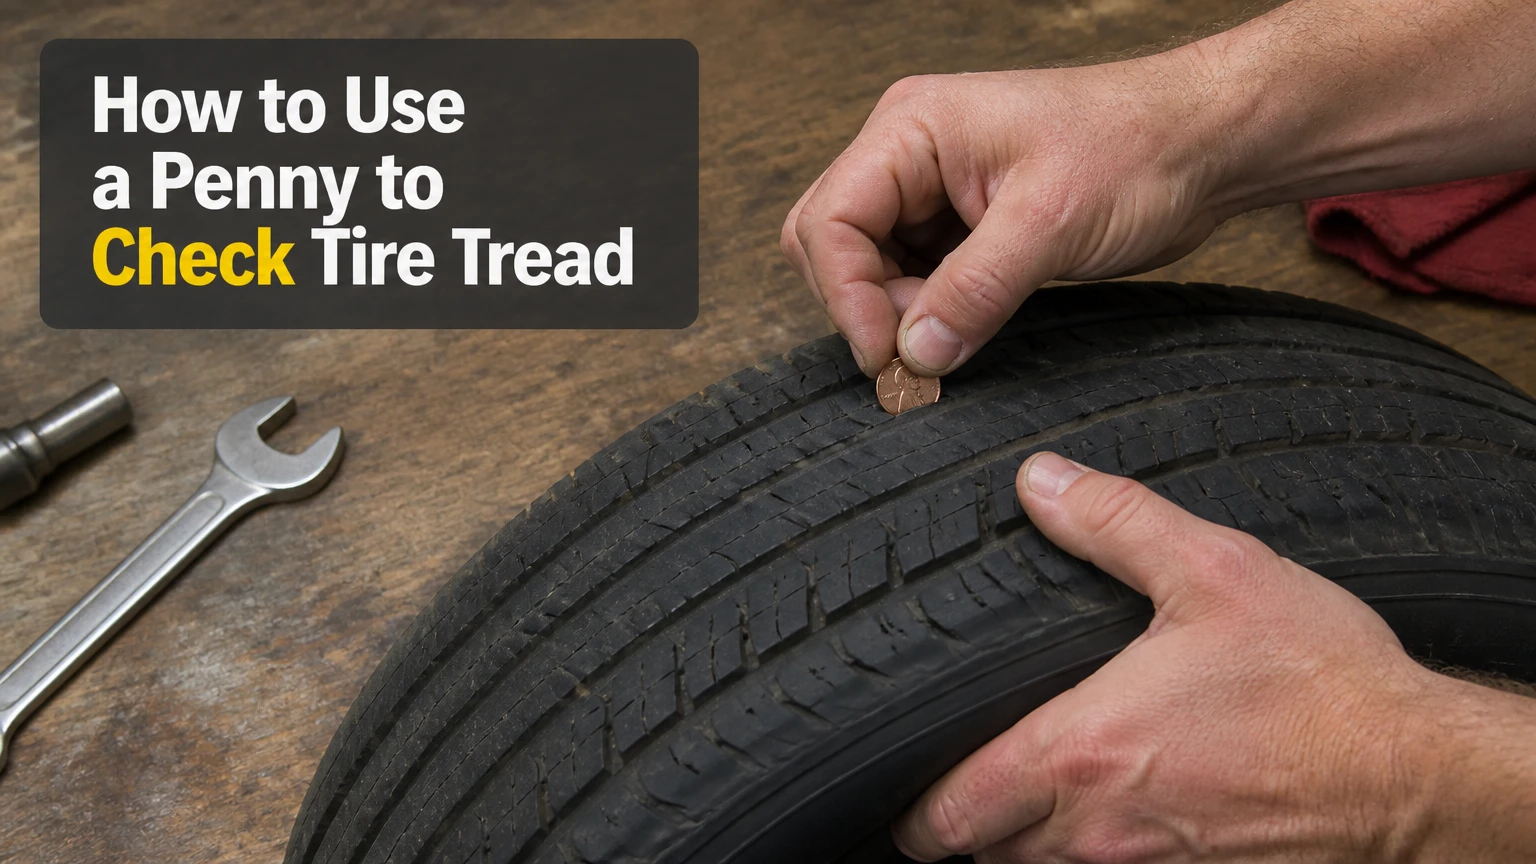
To use a penny to check tire tread, insert the coin into a main tread groove with Abraham Lincoln’s head pointing downward. If the tread covers part of Lincoln’s head, the groove has more than approximately 2/32 inch of tread; if the entire head remains visible, replace the tire.
Key Facts at a Glance
- The penny test checks whether tire tread is above approximately 2/32 inch.
- Lincoln’s head must point downward into the tread groove.
- A completely visible head indicates that the tread is worn to the replacement threshold.
- Every tire should be tested across the inner, center, and outer tread areas.
- The penny test cannot measure exact tread depth or diagnose every tire problem.
- A tread-depth gauge provides a more precise measurement than a coin.
Before You Start
The penny test is free, takes approximately two to three minutes for four tires, and requires no mechanical experience. The most important factor is testing several grooves rather than relying on one apparently healthy section.
| Requirement | What you need |
| Time | 2-3 minutes for four tires |
| Difficulty | Beginner |
| Cost | One cent if you already have a penny |
| Tool | Standard United States penny |
| Vehicle position | Parked on a flat, stable surface |
| Lighting | Daylight or a bright portable light |
| Tire condition | Grooves free of mud, stones, and compacted debris |
Park away from moving traffic. Apply the parking brake, switch off the engine, and allow hot tires to cool if the vehicle has just completed a long drive.
A penny test measures remaining tread. It does not determine tire pressure, sidewall strength, internal belt condition, rubber age, or whether a puncture is repairable.
How Does the Penny Tire Test Work?
The penny test uses the distance between the coin’s edge and the top of Abraham Lincoln’s head as an approximate 2/32-inch reference. When the surrounding tread hides part of Lincoln’s head, the tread extends above that reference point.
If the top of Lincoln’s head remains completely visible, the tread is approximately 2/32 inch deep or less at that location. The tire has reached the minimum replacement point represented by the test.
The penny is an indicator, not a calibrated measuring instrument. Coin position, groove shape, viewing angle, lighting, and wear irregularities can affect the result. Use it as a rapid screening method and confirm borderline readings with a tread-depth gauge.
How to Use Penny to Check Tire Tread Step by Step
Step 1: Park the Vehicle Safely
Park the vehicle on a flat, solid surface where you can inspect both sides without entering traffic. Apply the parking brake and place the transmission in Park, or in gear if the vehicle has a manual transmission.
Turn the front wheels slightly outward to expose more of the tread surface. Do not crawl underneath the vehicle or place any part of your body in the vehicle’s path.
You will know the vehicle is positioned correctly when every tire is accessible and the tread is visible under steady lighting.
Common mistake: Inspecting tires on a sloped driveway can make access awkward and create an unnecessary rolling hazard.
Step 2: Remove Debris From the Tread Grooves
Look for stones, packed mud, road salt, or other material inside the main circumferential grooves. Remove loose debris carefully before inserting the coin.
A blocked groove may prevent the penny from reaching the groove base, which can create a falsely reassuring result. Use your fingers, a soft brush, or a non-sharp plastic object.
You will know the groove is ready when the coin can rest directly against its bottom.
Common mistake: Using a screwdriver or sharp metal pick may cut the tread rubber.
Step 3: Hold the Penny Correctly
Hold the penny near its lower edge, close to the date, so Lincoln’s head remains visible. Keep the coin vertical rather than tilting it toward or away from the tread.
Lincoln’s head should face you during the inspection. This position makes it easier to see where the tread intersects the portrait.
You will know your grip is correct when your fingers do not cover Lincoln’s hair or the top of his head.
Common mistake: Holding the coin near Lincoln’s head blocks the exact reference area you need to inspect.
Step 4: Insert Lincoln’s Head Downward
Place the penny into one of the tire’s main tread grooves with Lincoln’s head pointing downward. Push the coin gently until its edge reaches the bottom of the groove.
Do not force the penny into a small surface cut, decorative sipe, or shallow shoulder feature. Use a major groove designed to carry water away from the tire’s contact patch.
You will know the penny is seated correctly when it remains straight and its lower edge touches the groove base.
Common mistake: Inserting Lincoln’s head upward reverses the reference and makes the result meaningless.
Step 5: Check Whether the Tread Covers Lincoln’s Head
Look straight across the tire at the point where the tread meets the penny. Avoid looking sharply downward because the angle can make more or less of Lincoln’s head appear visible.
If the tread covers part of the top of Lincoln’s head, the measured location has more than approximately 2/32 inch of tread. If the entire head is visible, the location has reached or fallen below the penny-test threshold.
Repeat the reading if the result appears borderline. Confirm uncertain results with a dedicated gauge.
Common mistake: Treating a barely covered head as proof that the tire is suitable for all weather. The penny test identifies a minimum threshold, not ideal wet-weather performance.
Step 6: Test the Inner, Center, and Outer Grooves
Measure at least three positions across each tire: the inner tread, center tread, and outer tread. Tire wear is often uneven, so a passing measurement in the center does not prove that both shoulders are safe.
Take another set of readings at a different point around the tire’s circumference when possible. This second position may reveal flat spots, alignment wear, or damage that the first inspection missed.
A tire should be judged by its lowest reading, not its average reading.
Common mistake: Measuring only the easiest visible groove can hide severe wear along the inner shoulder.
Step 7: Repeat the Test on Every Tire
Perform the same inspection on all four road tires. Front and rear tires can wear at different rates because of steering forces, drivetrain layout, braking loads, rotation history, and vehicle weight distribution.
Do not assume that matching tires have matching tread depth. One tire may be significantly more worn because of incorrect pressure, suspension wear, or alignment problems.
Inspect the spare tire as well if the vehicle carries a full-size or temporary spare. Tread is only one consideration for a spare, so also inspect its age, pressure, and visible condition.
Common mistake: Checking only the front tires overlooks worn rear tires, which can reduce stability in rain.
What Does the Penny-Test Result Mean?
A passing penny test means the inspected groove is deeper than approximately 2/32 inch. It does not necessarily mean the tire has strong wet-weather traction, even wear, correct pressure, or enough tread for winter conditions.
| Penny-test result | Approximate interpretation | Recommended response |
| Lincoln’s head is fully visible | Tread is about 2/32 inch or less | Replace the tire promptly |
| Top of Lincoln’s head is barely covered | Tread is slightly above 2/32 inch | Measure with a gauge and plan replacement |
| A substantial part of the head is covered | Tread exceeds the penny threshold | Continue monthly inspections |
| Different results across one tire | Uneven tread wear is present | Check pressure, alignment, and suspension |
| One tire fails while others pass | Localized or tire-specific wear | Inspect the failed tire professionally |
| Reading changes around the circumference | Irregular wear or flat spotting | Request a tire and suspension inspection |
A tire should be replaced when any important section reaches the limit, even if other sections still cover Lincoln’s head. The shallowest usable groove determines the tire’s ability to channel water and maintain consistent contact.
Is 2/32 Inch Enough Tire Tread?
A tread depth of 2/32 inch represents the penny-test replacement threshold, not a universal safety target for every condition. A tire near 2/32 inch has limited groove volume for moving water away from the contact patch.
Drivers who regularly encounter heavy rain should begin planning replacement before the tire fails the penny test. The supplied search overview identifies 4/32 inch as an important wet-weather threshold and notes that snow performance can become poor below approximately 5/32 inch.
| Tread depth | Practical meaning | Typical action |
| 10/32-11/32 inch | Common new passenger-tire range | Record as a starting measurement |
| 6/32 inch | Moderate remaining tread | Continue monthly checks |
| 5/32 inch | Reduced margin for snow use | Evaluate before winter driving |
| 4/32 inch | Wet-weather performance concern | Begin replacement planning |
| 3/32 inch | Close to the minimum | Replace soon, especially in rain |
| 2/32 inch | Penny-test failure threshold | Replace the tire |
Original tread depth varies by tire category and model. Performance tires, highway tires, all-terrain tires, and winter tires do not all begin with the same tread measurement.
Why Should You Test Several Parts of Each Tire?
Testing several areas reveals wear that one coin placement may miss. Incorrect wheel alignment, unsuitable tire pressure, worn suspension parts, delayed rotation, or aggressive driving can produce different depths across the same tread.
Center Wear
Excessive center wear commonly appears when the middle of the tread has less depth than both shoulders. Overinflation may contribute because excessive pressure can change the tire’s contact pattern.
Compare the pressure with the vehicle manufacturer’s specification, usually found on the driver-side doorjamb label. Do not use the maximum pressure printed on the tire sidewall as the routine inflation target.
Wear on Both Outer Edges
When both shoulders are more worn than the center, underinflation may be involved. Low pressure increases tire flex, heat generation, and shoulder loading.
Correct the pressure and inspect the tire for leaks. Adding air does not restore tread that has already worn away.
Wear on One Edge
Heavy wear on only the inner or outer shoulder often points to alignment or suspension geometry problems. A vehicle may also pull to one side, show an off-center steering wheel, or wear replacement tires unusually quickly.
An alignment should be considered after curb impacts, pothole strikes, suspension repairs, or the installation of new tires when the previous set wore unevenly.
Cupping or Scalloped Wear
Cupping appears as alternating high and low patches around the tread. Possible contributors include worn shock absorbers, unbalanced wheel assemblies, loose suspension components, or prolonged irregular contact with the road.
A penny test may produce different readings every few inches when cupping is present. The underlying mechanical problem should be corrected before it damages another tire.
| Wear pattern | What you may observe | Possible contributor |
| Center wear | Center fails before shoulders | Excessive inflation |
| Both-edge wear | Both shoulders fail first | Insufficient inflation |
| One-edge wear | Inner or outer shoulder is shallow | Alignment or suspension geometry |
| Cupping | Repeating high and low patches | Shocks, balance, or suspension wear |
| Flat spot | One localized shallow area | Hard braking or prolonged parking |
| Patchy wear | Irregular readings across tread | Rotation, balance, or component issues |
These patterns are diagnostic clues rather than final diagnoses. Tire construction, vehicle design, driving habits, and mechanical condition must be assessed together.
Penny Test vs. Quarter Test vs. Tread Gauge
The penny test is best for identifying the approximate 2/32-inch minimum. A quarter gives an earlier warning near 4/32 inch, while a tread-depth gauge provides an actual numeric measurement.
| Method | Approximate threshold or output | Typical cost | Best use | Main limitation |
| Penny test | About 2/32 inch | $0.01 | Rapid minimum-depth screening | Does not provide an exact number |
| Quarter test | About 4/32 inch | $0.25 | Earlier wet-weather warning | Still relies on visual judgment |
| Mechanical gauge | Numeric depth in 32nds or millimeters | $5-$15 | Routine maintenance and wear tracking | Must be positioned correctly |
| Digital gauge | Numeric digital reading | $10-$25 | Detailed comparison among grooves | Battery and calibration may matter |
| Wear-indicator bars | 2/32-inch built-in reference | Included with tire | Quick visual confirmation | Dirt and lighting can hide the bars |
Is the Quarter Test Better?
The quarter test is more conservative for wet-weather planning because the distance from the coin’s edge to the top of George Washington’s head corresponds to approximately 4/32 inch. If the tread does not cover part of Washington’s head, replacement planning should begin.
The quarter test does not replace a gauge. It simply uses a higher warning threshold than the penny test.
Is a Tread-Depth Gauge Worth Buying?
A tread gauge is worth buying when you drive frequently, manage several vehicles, monitor uneven wear, or want to compare measurements after tire rotations. A mechanical gauge is inexpensive and does not require a battery.
Measure each groove at several points and record the lowest value. Consistent records can show whether a tire is wearing normally or losing tread faster in one position.
How Do Tread-Wear Indicator Bars Work?
Tread-wear indicator bars are narrow raised strips molded across the main tire grooves. When the surrounding tread wears down until it becomes level with these bars, the tread has reached approximately 2/32 inch.
Look across the grooves rather than along them. Several bars are normally positioned around the tire’s circumference, allowing the driver to compare wear at multiple locations.
A tire should not remain in service merely because one wear bar is still recessed. If another bar is flush with the tread, or a shoulder has reached the minimum, the tire requires attention.
Common Penny-Test Mistakes and How to Fix Them
Testing Only One Groove
One groove cannot represent the entire tire. Repeat the test across the inner, center, and outer tread, then inspect another point around the circumference.
Inserting the Penny the Wrong Way
Lincoln’s head must point downward. Remove the penny, rotate it, and repeat the measurement if the head was facing upward.
Looking From Above
An angled view can distort the apparent point where the tread meets Lincoln’s head. Lower your eye level and look directly across the groove.
Measuring a Sipe Instead of a Main Groove
Sipes are narrow slits that improve traction but are not the correct locations for a penny measurement. Use one of the wide, deep circumferential grooves.
Ignoring Dirt or Embedded Stones
Debris can stop the penny before it reaches the groove bottom. Clean the groove and repeat the test without cutting or puncturing the rubber.
Treating a Pass as a Complete Safety Inspection
A tire can pass the penny test and still be unsafe because of sidewall cracking, bulges, exposed cords, punctures, age-related deterioration, vibration, or internal damage. Inspect the entire tire and seek professional evaluation when damage is visible.
When Should You Check Tire Tread?
Check tire tread at least once a month and before long trips. More frequent inspection is appropriate during rainy seasons, before winter travel, after striking a pothole, or when the vehicle develops vibration, pulling, or unusual road noise.
| Situation | Inspection timing | Additional check |
| Routine driving | Once each month | Pressure and visible damage |
| Long road trip | Several days before departure | Spare tire and inflation equipment |
| Heavy rainy season | Every 2-4 weeks | Use the 4/32-inch warning level |
| Pothole or curb impact | As soon as safely possible | Sidewall, wheel, and alignment |
| Steering pull or vibration | Immediately | Balance, alignment, and suspension |
| Tire rotation | Before and after service | Record tread depth by position |
| Used-tire purchase | Before installation | Age, repairs, and internal condition |
Monthly inspection works best when combined with pressure checks. Measure pressure when the tires are cold and use the vehicle manufacturer’s recommended values.
When Should a Tire Be Replaced Immediately?
Replace or professionally inspect a tire immediately when the tread reaches 2/32 inch, cords become visible, a bulge appears, a deep cut exposes internal material, or the tire repeatedly loses pressure.
Low tread is only one replacement reason. Stop driving when damage suggests that the structure may fail.
Prompt professional inspection is also appropriate when:
- One section fails the penny test while nearby sections pass.
- The inner shoulder is bald but difficult to see from outside.
- Tread separates, lifts, or develops an unusual raised area.
- A vibration begins suddenly after an impact.
- The tire contains a puncture near the shoulder or sidewall.
- Cracks extend deeply into the rubber.
- Several wear bars are flush with the tread.
Do not attempt to judge internal belt damage with a penny. The coin measures groove depth only.
Limitations of the Penny Test
The penny test is simple and useful, but it is not precise enough for detailed tire management. It identifies an approximate threshold and cannot tell you whether a groove measures 3/32, 4/32, or 5/32 inch.
The test is also based on a United States coin. Drivers outside the United States should use a calibrated tread-depth gauge or a locally recognized measurement method instead of substituting an unrelated coin.
Most importantly, the penny test gives a late warning. A tire can remain slightly above 2/32 inch while delivering significantly less wet-weather capability than it had when new. Drivers facing heavy rain, standing water, or winter roads should apply a larger safety margin.
Expert Rules of Thumb
First, judge a tire by its lowest valid tread reading. Averaging several measurements can hide one unsafe shoulder.
Second, replace tires before the minimum when the operating environment demands it. Frequent rain, snow, high-speed motorway travel, and heavy vehicle loading reduce the value of waiting until the penny test fails.
Third, correct the cause of uneven wear before installing new tires. New rubber cannot compensate for incorrect alignment, damaged suspension parts, improper pressure, or neglected rotation.
Conclusion
Knowing how to use penny to check tire tread provides a fast way to identify tires that have reached approximately 2/32 inch. Insert Lincoln’s head downward, test every major groove across all four tires, and replace any tire where the entire head remains visible.
Use the penny test as a minimum-depth screen rather than a complete safety verdict. A quarter or tread-depth gauge provides earlier or more precise information, while pressure checks, damage inspections, and professional evaluation address risks a coin cannot detect.
Frequently Asked Questions
Can I use any year of United States penny?
Yes. The penny test depends on the position of Abraham Lincoln’s head relative to the coin’s outer edge, not the coin’s mint year. The portrait design must remain clear enough to identify the top of Lincoln’s head. A bent, heavily damaged, or severely worn coin should not be used.
Should I test tire tread when the tires are hot or cold?
Tread can be inspected when tires are hot or cold, but a cool tire is easier and safer to handle after the vehicle has been parked. Tire pressure should be checked cold because driving heat raises internal pressure. Avoid touching tires immediately after high-speed travel if they feel unusually hot.
Does passing the penny test mean my tire is safe?
No. Passing means only that the measured groove is deeper than approximately 2/32 inch. The test does not identify sidewall damage, internal belt separation, excessive age, incorrect pressure, punctures, poor wet-weather performance, or uneven wear in an untested location.
Can I drive in rain if Lincoln’s head is partially covered?
A partially covered head means the tread is above the penny threshold, but it does not guarantee strong wet-road performance. Measure the actual depth with a gauge. If the tire is near 4/32 inch and you regularly drive in heavy rain, begin planning replacement rather than waiting for a penny-test failure.
What if one tire fails but the other three pass?
The failed tire requires replacement or professional evaluation, but the cause should also be investigated. Compare tread depth, tire age, axle position, pressure, alignment, and drivetrain requirements. Some all-wheel-drive vehicles restrict how much tread-depth difference is acceptable between tires, so consult the owner’s manual.
Can the penny test check motorcycle or truck tires?
The basic method can screen tread grooves on many tires, but legal requirements, original tread depths, wear limits, and operational demands vary by vehicle and tire type. Commercial trucks, motorcycles, winter tires, and specialty tires should be measured with an appropriate tread-depth gauge and evaluated against their applicable specifications.