Checking your tire tread depth takes under ten minutes and requires nothing but a simple measuring tool to ensure your vehicle remains safe. This five-step process will teach you exactly how to check tire tread with a ruler, record accurate measurements, and evaluate if you need immediate tire replacements.
Before You Start
- Time Required: 10 to 15 minutes.
- Difficulty Level: Beginner.
- Cost: 0 to 5 dollars.
- Tools and Materials Needed:
- 1 standard ruler with 1/16-inch or 1-millimeter markings. The ruler must have a “true zero” edge where the markings start exactly at the physical end of the tool.
- 1 notepad and pen for logging the 12 distinct measurements.
- 1 smartphone flashlight or focused shop light.
- 1 small flathead screwdriver or blunt key.
- Prerequisites: The vehicle must be parked on a flat, solid surface like a concrete garage floor or paved driveway. The parking brake must be fully engaged.
Step 1: Park the Vehicle and Position the Wheels
Configure your vehicle so the front tires are fully exposed for accurate measurement. Park on a flat, level surface, engage the emergency parking brake completely, and turn the steering wheel locked fully to the left or right.
To do this correctly, start the engine, turn the steering wheel as far as it will go in one direction, and then shut the engine off. This exposes the entire face of the front tires, allowing you to view the tread channels directly without contorting your body under the wheel well. For the rear tires, you will not be able to turn them. You must rely on clear lighting and getting low to the ground to see the rear tread.
You will know this step worked when you can clearly see the inner, middle, and outer grooves of the front tires without having to bend your head underneath the vehicle fender.
The most common mistake at this stage is attempting to measure the tires while they are pointed perfectly straight. This forces you to measure blindly by feeling around the wheel well, which guarantees a tilted ruler and inaccurate data.
Step 2: Validate the Ruler and Clear the Tread
Verify that your ruler starts exactly at zero and remove all debris from the tire channels. Inspect the bottom edge of your ruler. The 0-inch or 0-millimeter mark must sit perfectly flush with the physical edge of the plastic or metal.
If your ruler has a blank plastic gap between the physical edge and the first measurement line, you cannot use it. That blank space will sit at the bottom of the tire groove, making your tire tread seem 1/16 to 1/8 of an inch deeper than it actually is. Once your tool is validated, use your small flathead screwdriver or key to pop out any gravel, pebbles, or dried mud trapped inside the deep vertical grooves of all four tires.
You will know this step worked when the ruler can touch the absolute bottom of the rubber channel without sitting on top of a rock or piece of dirt.
The most common mistake here is assuming small pebbles will just move out of the way. Pushing a ruler down onto a small piece of gravel will steal 2/32 of an inch from your reading, leading you to prematurely throw away perfectly good tires.
Step 3: Locate the Proper Measurement Channels
Identify the main circumferential grooves on the tire and locate the raised tread wear indicator bars to avoid them. Look for the wide, deep channels that run in a continuous circle all the way around the circumference of the tire.
You need to select three specific measurement points on each tire: the innermost circumferential groove, the center groove, and the outermost circumferential groove. Do not choose the absolute edge of the tire where the tread tapers off to meet the sidewall. Scan the length of the groove you selected and find a spot that is free of tread wear indicators. Wear indicators are small, raised horizontal bands of rubber molded directly into the bottom of the grooves.
You will know this step worked when you have visually locked onto a smooth, deep, unobstructed section of the groove that sits flat against the structural base of the tire.
The most common mistake at this step is placing the ruler directly on top of the raised tread wear indicator bar. Measuring on top of this bump will give you an artificially shallow reading, falsely indicating that your tire is completely bald.
Step 4: Insert the Ruler and Record the Reading
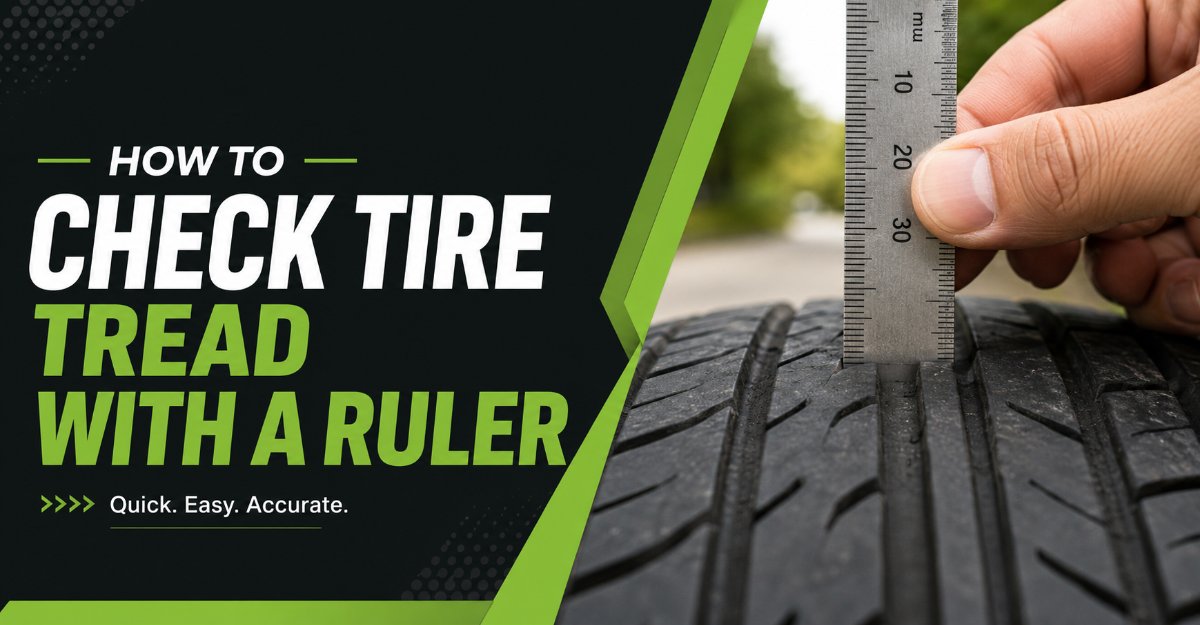
Place the ruler vertically into the groove and read the measurement precisely at eye level. Insert the zero-edge of the ruler directly into the bottom of the selected groove.
Hold the ruler at a perfect 90-degree angle to the surface of the tire. Do not let it lean forward or backward. Slide your thumbnail down the flat side of the ruler until your nail rests entirely flat against the top of the adjacent rubber tread block. Shine your flashlight directly onto the ruler to illuminate the small markings. Lower your head so your eyes are perfectly level with your thumbnail, and read the exact fraction or millimeter mark. Write this number down on your notepad, noting the tire location and groove position (for example: Front Left Tire, Outer Groove, 5/32 inch).
You will know this step worked when you have 12 distinct measurements written on your notepad, representing the inner, middle, and outer depths for all four tires.
The most common mistake here is parallax error. If you stand above the tire and look down at the ruler, the angle of your vision will make the tread look thicker than it is. You must bring your eyes down to the exact level of the tread block to get an accurate reading.
Step 5: Evaluate Results Against Seasonal Standards
Compare your written measurements against standard safety minimums to determine if the vehicle is safe to drive. Review the 12 numbers on your notepad.
If your lowest recorded number is 6/32 of an inch (5 millimeters) or higher, your tires have plenty of life left and are safe for all weather conditions. If your readings fall between 4/32 and 5/32 of an inch (3 millimeters to 4 millimeters), you are losing wet weather traction. You will need to budget for new tires soon, as hydroplaning risk increases significantly in this range. If any single measurement on any tire is 2/32 of an inch (1.6 millimeters) or lower, the tire is legally bald. You must replace the tire immediately.
You will know this step worked when you have a definitive, data-backed conclusion about the safety status of your tires and a clear timeline for replacement.
The most common mistake is averaging the numbers together. If the outside of your tire is 6/32 but the inside is 2/32, the tire is fundamentally unsafe and legally bald. You evaluate the tire based solely on its lowest measured point, never the average.
Common Mistakes and How to Fix Them
Checking tire tread seems foolproof, but slight physical miscalculations can severely skew the data. Here are the most frequent failure points and exactly how to recover from them.
Measuring the Wear Bars
Placing the measuring tool onto the built-in wear indicators gives a false shallow reading. The wear bars sit 2/32 of an inch above the base of the tire. If you measure here, a healthy tire will appear bald.
- How to fix it: Pull the ruler out, move it two inches to the left or right along the same circumferential groove, and ensure the tip touches the absolute bottom of the channel.
Using a Ruler with a Dead Space Before Zero
Most classroom rulers feature a blank plastic margin before the measurement lines begin. This margin hides the actual depth of the tread.
- How to fix it: If you cannot find a true-zero ruler, you must measure the blank margin first. If the blank margin is 1/16 of an inch, you must subtract 1/16 of an inch from every final reading you take on the tire.
Ignoring Rear Tires Because They Are Hard to Reach
Because you cannot turn the rear wheels outward, many people skip measuring them or only check the easily accessible outer edge.
- How to fix it: Put a piece of cardboard on the ground. Lie on your back with your flashlight and slide behind the rear bumper to gain a clear line of sight to the inner grooves of the rear tires.
Reading the Ruler at an Angle
Looking down at the ruler from a standing position inflates the actual tread depth measurement due to optical distortion.
- How to fix it: Use the thumbnail method. Pinch the ruler with your thumbnail resting flat on the tread block, pull the ruler out of the tire completely, and read the measurement where your thumbnail remains locked in place.
Variations for Different Situations
Your approach to measuring tread must adapt based on the type of tires you have and the tools available in your garage.
Winter Tires and Snow Conditions
Standard all-season tires are legally viable down to 2/32 of an inch. Winter tires operate under different physics. Because snow tires require deep grooves to pack and eject snow, they lose their functional winter traction at 6/32 of an inch. If you are measuring dedicated winter tires, treat 5/32 of an inch as the failure point, not 2/32.
Using a Metric Ruler Instead of Imperial
If your ruler only has millimeter markings, the evaluation math changes entirely. A new passenger tire usually starts at 8 millimeters to 9 millimeters. The warning zone for reduced wet traction begins at 3 millimeters to 4 millimeters. The absolute legal minimum for safety is 1.6 millimeters.
Diagnosing Suspension Problems via Tread Wear
If your recorded measurements show a massive difference on the same tire, you are diagnosing a mechanical failure. If the inner groove measures 2/32 of an inch but the outer groove measures 7/32 of an inch, your wheel alignment is severely out of specification. You must replace the tire and immediately pay for a professional wheel alignment.
How Long Does It Take and What Does It Cost?
Executing this task correctly requires very little time or financial investment.
- Time Investment: Expect to spend 10 to 15 minutes. Turning the wheels, clearing the grooves, and taking 12 separate measurements requires careful pacing. Rushing the process leads to inaccurate readings.
- Financial Cost: The procedure costs nothing if you already own a ruler and a flashlight. If you need to purchase a machinist scale or a true-zero small metal ruler from a hardware store, expect to spend between 2 and 5 dollars.
Frequently Asked Questions
Is 4/32 tire tread good?
No. A depth of 4/32 of an inch means your tires are approaching the end of their safe usable life. While they are still legally permissible to drive on in most areas, your stopping distance in the rain is significantly compromised. You should begin shopping for replacements.
Where are the tread wear bars located?
Tread wear bars are spaced evenly throughout the main circumferential grooves of the tire. They look like small, flat bridges of rubber connecting the adjacent tread blocks. When the main tread wears down flush with these bars, the tire has reached the 2/32 of an inch legal limit.
How do you know if your tires are bald?
Your tires are legally bald when the depth of any main groove reaches 2/32 of an inch or 1.6 millimeters. You can identify this by measuring with a ruler or by checking if the raised tread wear indicator bars sit completely flush with the surrounding rubber surface.
Can I use a printable ruler to measure tread?
You should avoid printable rulers. Printers frequently scale documents to fit margins, which alters the actual physical distance between the measurement lines. Furthermore, a paper ruler will bend and crumple when pressed firmly into the bottom of a tight rubber tire groove.
Why is inner tire wear worse than outer wear?
Tires wear heavily on the inside edge due to improper wheel alignment, specifically excessive negative camber or improper toe settings. If your inner tread is significantly shallower than your middle or outer tread, your suspension parts are forcing the tire to drag unevenly across the pavement.
To finalize your maintenance check, make a habit of measuring how to check tire tread with a ruler at the start of every changing season. Consistent monitoring protects your suspension components, maximizes your fuel efficiency, and guarantees your vehicle will stop predictably when you need it most.