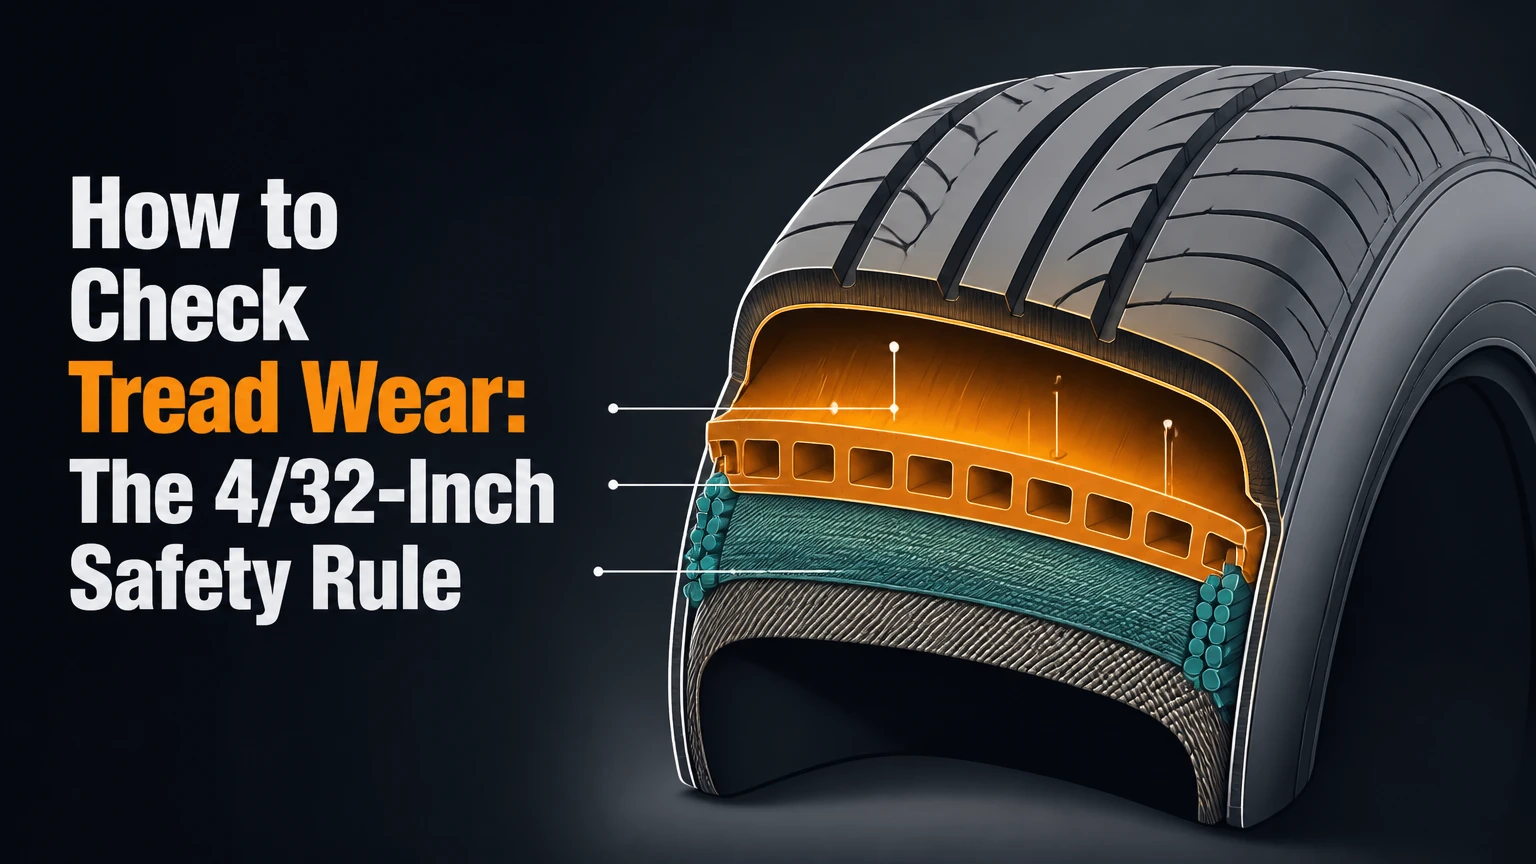
To check tread wear, inspect every tire at the inner, center, and outer tread zones, then measure the lowest groove depth with a tread-depth gauge. A reading of 4/32 inch or less indicates substantially reduced wet-road reserve, while 2/32 inch is the common U.S. legal replacement threshold. Check tread condition, damage, and wear pattern together.
Key Facts at a Glance
- Passenger tires commonly start with approximately 10/32-11/32 inch of tread, although the specification varies by tire model.
- A tread-depth gauge gives the most useful home measurement because it reports an actual value in 32nds of an inch or millimeters.
- Tire wear bars indicate approximately 2/32 inch, so a tire can be unsafe in heavy rain before the bars become flush.
- Measure at least three points around the circumference and across the inner, center, and outer tread areas.
- Center wear commonly indicates overinflation, while wear on both shoulders commonly indicates underinflation.
- Tread depth cannot reveal every safety problem. Cracks, bulges, exposed cords, punctures, separation, and advanced age require separate inspection.
What Tread Wear Means
Tread wear is the loss of rubber from the tire’s grooves and tread blocks through contact with the road. Tread depth matters because the grooves provide channels for water to leave the contact patch, allowing the rubber to maintain contact with wet pavement.
A worn tire has less space to move water. The result can be longer wet braking distances and a greater likelihood of hydroplaning, particularly at higher speeds or in standing water. The U.S. Tire Manufacturers Association identifies 2/32 inch as the conventional replacement limit in the United States, but tire manufacturers and safety organizations commonly recommend replacement earlier when wet-weather performance matters.
The 4/32-inch point is a practical safety threshold, not a universal law. Michelin, for example, has long advised drivers to consider replacing tires at 4/32 inch because wet braking performance can decline before the legal minimum. Local laws may differ, so the applicable transportation authority and tire manufacturer remain the final references for legal and product-specific requirements.
Which Tread Depth Numbers Matter?
Tread depth should be interpreted by both measurement and driving conditions. A 5/32-inch tire may be serviceable for a dry-climate commuter but offer less wet-weather margin than a new tire, while a winter tire can need substantially more tread to preserve snow traction.
| Tread depth | Approximate metric value | Practical interpretation | Recommended action |
|---|---|---|---|
| 10/32-12/32 inch | 7.9-9.5 mm | Typical new passenger-tire range | Monitor normally |
| 8/32-6/32 inch | 6.3-4.8 mm | Usable tread with remaining reserve | Inspect monthly |
| 5/32-4/32 inch | 4.0-3.2 mm | Reduced wet-weather reserve | Plan replacement, especially before rain |
| 3/32 inch | 2.4 mm | Marginal wet-weather performance | Replace soon |
| 2/32 inch or less | 1.6 mm or less | Common U.S. legal limit; wear bars may be flush | Replace immediately |
| 6/32 inch or less on winter tires | 4.8 mm or less | Snow traction can decline significantly | Consider replacement before winter |
Legal minimums vary by country, state, vehicle class, and tire category. Do not treat 2/32 inch as a performance recommendation. It is a limit used for legal enforcement in many U.S. jurisdictions, not a promise that the tire will brake well on wet roads.
Before You Start
A complete inspection takes approximately 10-20 minutes for four tires with a manual gauge. The job requires no vehicle lifting if the steering can expose the front tread and the rear tires remain accessible.
| Item | Typical quantity or specification | Purpose |
|---|---|---|
| Tread-depth gauge | 1, measuring 0-32/32 inch or 0-25 mm | Actual groove-depth measurement |
| Tire-pressure gauge | 1, readable to at least 1 psi | Verifies pressure-related wear causes |
| Flashlight | 1, preferably high-output LED | Illuminates inner shoulders and sidewalls |
| Pen and inspection sheet | 1 each | Records inner, center, outer readings |
| Clean cloth | 1 | Removes mud from tread blocks and sidewalls |
| Flat plastic pick | 1 | Removes stones without damaging rubber |
Park on level, stable ground. Put an automatic transmission in Park, select first gear or reverse in a manual vehicle, apply the parking brake, and switch off the engine. Never place any part of your body under a vehicle for a tread check unless the vehicle is properly supported with rated stands.
How to Check Tread Wear Step by Step
Step 1: Secure and Identify Every Tire
Park the vehicle, secure it, and label the four tire positions as front-left, front-right, rear-left, and rear-right. Record the tire brand, model, size, and visible damage before taking measurements.
The vehicle does not need to be lifted for a normal tread inspection. Turn the steering wheel to expose the front tire’s inner shoulder, but do not rely on steering angle alone because the rear tire’s inner edge can remain hidden.
You’ll know it worked when: the vehicle cannot roll and you can reach the tread without kneeling in traffic or placing yourself beneath the vehicle.
Common mistake: checking only the two front tires because they are easier to see. Rear tires can develop severe inner-edge wear that is invisible from outside the car.
Step 2: Inspect the Whole Tire Visually
Walk around each tire and look for cuts, cracks, bulges, punctures, exposed cords, missing tread blocks, or objects embedded in the tread. Examine the sidewall on both sides where possible, using a flashlight for the inner side.
A bulge usually indicates internal cord damage and cannot be corrected by adding air. Exposed steel or fabric cords, a belt separation, or a rapidly losing tire requires immediate professional attention rather than a tread measurement.
You’ll know it worked when: you have identified damage before touching the gauge and have not assumed that deep tread means a structurally sound tire.
Common mistake: continuing to drive on a tire with a sidewall bubble because the grooves still look deep. Structural damage can cause failure independently of tread depth.
Step 3: Clean the Measurement Grooves
Remove stones, mud, and packed debris from the main circumferential grooves with a plastic pick or your fingers. Do not use a knife or screwdriver aggressively, because cutting a groove or damaging a sipe creates a separate tire defect.
Find the deepest open groove near the tire’s center and the corresponding usable grooves toward each shoulder. Avoid measuring directly on a tread-wear indicator, which is a raised bridge inside the groove and will produce a false result.
You’ll know it worked when: the gauge probe can reach the groove base without resting on gravel, mud, or a molded wear bar.
Common mistake: measuring a groove that contains a wear bar. Move the probe slightly along the circumference until it sits in unobstructed groove rubber.
Step 4: Check the Inner, Center, and Outer Zones
Divide the tread face into three measurement bands: inner shoulder, center tread, and outer shoulder. The inner shoulder is often the most important zone to inspect because alignment problems can consume rubber there while the outside shoulder still appears acceptable.
Some tires have asymmetric tread designs, shoulder ribs, or grooves that are not intended for direct measurement. Use the major grooves specified by the tire’s tread pattern, and compare equivalent positions across the tire rather than measuring a decorative sipe.
Take one reading in each zone at a location that is easy to reach. The three-zone pattern reveals whether pressure or alignment is causing a difference across the contact patch.
You’ll know it worked when: each tire has separate inner, center, and outer readings, rather than one overall estimate.
Common mistake: measuring only the most visible center groove. That misses one-sided camber wear and can overstate the tire’s remaining service life.
Step 5: Take Multiple Readings Around Each Tire
Place the gauge base flat on the tread block and press the probe into the bottom of an open groove. Read the value without tilting the tool, then repeat at several positions around the tire’s circumference.
A practical home inspection uses at least three circumferential positions, separated by roughly one-third of the tire, and three across-tread zones at each position. That produces up to nine readings per tire. A six-reading minimum, consisting of inner, center, and outer measurements at two circumferential positions, is better than a single spot when time is limited.
| Tire position | Inner zone | Center zone | Outer zone | Lowest reading |
|---|---|---|---|---|
| Front left | ___/32 | ___/32 | ___/32 | ___/32 |
| Front right | ___/32 | ___/32 | ___/32 | ___/32 |
| Rear left | ___/32 | ___/32 | ___/32 | ___/32 |
| Rear right | ___/32 | ___/32 | ___/32 | ___/32 |
Use the lowest credible reading as the tire’s effective tread depth. A tire with 7/32 inch in the center and 3/32 inch on the inner shoulder does not have 7/32 inch of usable, even wear.
You’ll know it worked when: every tire has recorded values and the lowest number is clearly identified.
Common mistake: averaging all readings until a dangerous low spot disappears. Replacement decisions should account for the lowest area and the reason for the variation.
Step 6: Compare the Tires and Check Pressure
Compare left and right tires on the same axle, then compare front and rear patterns. Differences of 2/32 inch or more across equivalent positions deserve investigation, especially on vehicles with directional handling or all-wheel drive.
Check inflation pressure only when the tires are cold, ideally before driving or after the vehicle has been parked for at least three hours. Use the vehicle manufacturer’s door-jamb placard, not the maximum pressure molded into the sidewall. The sidewall value is a maximum tire rating, not the vehicle’s target setting.
You’ll know it worked when: pressure matches the placard and the measurement sheet shows whether wear is even across axles and across each tread face.
Common mistake: lowering pressure to correct center wear without measuring cold pressure first. A tire may appear overinflated after highway driving because heat raises its pressure naturally.
Which Tool Should You Use?
A mechanical tread-depth gauge is the best value for most drivers because it costs little, works without batteries, and provides an actual measurement. Wear bars are suitable for a fast pass/fail check, while coins can screen for severe wear but cannot reliably distinguish 4/32 inch from nearby values.
| Method | Typical cost | Practical accuracy | Best use | Main limitation |
|---|---|---|---|---|
| Molded wear bars | $0 | About 2/32 inch pass/fail | Quick roadside visual check | Does not identify 4/32-inch wear |
| Penny or quarter test | $0 | Approximate only | Emergency screening | Coin orientation and tread shape affect result |
| Manual pin gauge | $3-$10 | Usually readable to 1/32 inch | Home maintenance | Requires a flat base and correct groove placement |
| Digital gauge | $5-$20 | Often readable to 0.1 mm | Frequent inspections and records | Battery or calibration problems |
| Optical smartphone scanner | Free to subscription | Model and lighting dependent | Fleet history and full-profile scans | Not a substitute for physical damage inspection |
The penny test is often described as showing whether Lincoln’s head is covered, but coin-based checks are not standardized measurement instruments. A quarter can suggest reduced tread near 4/32 inch, yet tread curvature, coin wear, camera angle, and user judgment can change the result.
Digital gauges are convenient, not automatically more accurate. Zero the instrument on a flat surface, confirm its unit setting, and repeat an unexpected reading with a second measurement. Optical applications can map large fleets efficiently, but a dirty tire, poor lighting, unusual tread design, or damaged block can confuse image analysis.
What Do Common Wear Patterns Reveal?
Tire wear patterns provide clues about inflation, alignment, rotation, balance, and suspension condition. Tread depth identifies how much rubber remains, but the pattern explains why the rubber disappeared.
| Visible pattern | Likely mechanical cause | Confirmation check | Corrective action |
|---|---|---|---|
| Center rib lower than shoulders | Sustained overinflation | Compare cold pressure with placard | Set placard pressure and monitor |
| Both shoulders lower than center | Sustained underinflation or overload | Inspect pressure history and load | Inflate correctly and check for leaks |
| One inner or outer edge low | Camber or toe misalignment | Alignment measurement | Repair worn parts, then align |
| Cupped or scalloped dips | Wheel hop, worn shocks, imbalance | Bounce, suspension, and balance inspection | Diagnose suspension and balance |
| Feathered block edges | Toe misalignment | Run a hand lightly across tread, safely | Obtain alignment inspection |
| One repeating low spot | Brake, balance, or suspension issue | Rotate tire and inspect wheel assembly | Professional diagnosis |
Center Wear
Center tread wear usually points to excessive inflation relative to the vehicle’s load and tire design. Confirm the condition with repeated cold-pressure readings before changing pressure, because center wear can also result from a tire profile mismatch or long-term overloading.
Shoulder Wear
Wear on both shoulders commonly indicates underinflation, overloading, or prolonged operation with insufficient pressure. Correct pressure gradually and inspect for a slow puncture, valve leak, or incorrect tire size rather than assuming the problem is solved immediately.
One-Sided and Feathered Wear
One-sided inner or outer wear commonly indicates incorrect camber, toe, worn control-arm components, or bent suspension parts. Feathering, where tread blocks feel smooth in one direction and sharp in the other, is especially suggestive of toe-related alignment error.
Do not request an alignment before checking suspension condition. A shop that aligns a vehicle with a worn tie-rod end or control-arm bushing may produce a temporary measurement that changes again after the part moves.
Cupping and Scalloping
Cupping appears as repeating dips or scallops around the circumference. Worn dampers, wheel imbalance, loose suspension components, or poor tire rotation can contribute, so replacing the tire alone may leave the mechanical cause active.
Common Mistakes and How to Fix Them
Measuring One Tire in One Place
A single measurement can miss an inner-edge bald spot or a localized defect. Measure all four tires across three zones and multiple circumferential positions.
Treating Wear Bars as a Safety Target
Wear bars sit at approximately 2/32 inch and indicate the common legal limit, not ideal wet-weather performance. Replace or professionally assess tires before that point when rain, high speed, heavy loads, or long trips are routine.
Using the Sidewall Pressure Number
The maximum pressure molded into a tire sidewall is not the recommended vehicle pressure. Set cold pressure to the door-jamb placard unless a qualified tire professional provides a documented vehicle-specific reason to differ.
Ignoring the Inner Shoulder
A tire can look acceptable from the outside while its inner shoulder is nearly bald. Turn the steering wheel for the front tires and use a flashlight or professional inspection for rear inner edges.
Measuring on Tread Bars or Debris
A probe resting on a wear bar reads artificially high. Clear the groove and place the probe in the open channel beside the indicator.
Confusing Tread Depth With Tire Health
Deep tread does not cancel out a sidewall bubble, dry rot, puncture, belt separation, or unsafe repair. Stop using a tire with exposed cords, a sidewall bulge, major cracking, or suspected separation until a tire professional evaluates it.
How Often Should You Check Tread Wear?
Most daily drivers should check tread depth and visible condition once a month and before long trips. Check more frequently after alignment repairs, severe pothole impacts, track use, towing, seasonal tire changes, or any warning of pressure loss.
| Driving situation | Inspection interval | Extra check |
|---|---|---|
| Normal commuting | Monthly | Cold pressure and sidewalls |
| Heavy rain or high-speed highway travel | Every 2-4 weeks | Replace planning at 4/32 inch |
| Winter or mountain driving | Monthly and before snow season | Measure all four tires and inspect sipes |
| Towing or heavy payloads | Before every major trip | Load rating, pressure, and heat damage |
| Used vehicle purchase | Before purchase and after 500 miles | Inner edges, age, repairs, alignment |
| Fleet or commercial operation | Pre-trip plus weekly recorded depth | Damage, pressure, and axle comparison |
Seasonal conditions change the decision threshold. Drivers who regularly encounter standing water should plan replacement before 4/32 inch, while winter drivers should consider the tire manufacturer’s snow-traction guidance rather than applying a summer-tire threshold mechanically.
When Should You Replace or Seek Professional Help?
Replace tires at or below 2/32 inch in jurisdictions using that legal limit, but arrange replacement earlier when readings reach 4/32 inch and wet braking, highway travel, or severe weather is common. Seek professional help for uneven wear, damage, repeated pressure loss, or readings that differ sharply across one tire.
A tire shop should inspect the vehicle when one tire is more than 2/32 inch different from its axle partner, when wear is concentrated on one edge, or when cupping returns after rotation. Alignment and suspension repairs should occur before fitting new tires when mechanical faults are present.
Replace tires as an axle-matched pair when appropriate for the vehicle, and follow the vehicle manufacturer’s requirements for all-wheel-drive tread-depth differences. Some all-wheel-drive systems have strict limits on circumference variation, so fitting one new tire may require matching or shaving the others. Confirm the requirement in the owner’s manual or with the tire manufacturer.
Tire age also matters. The National Highway Traffic Safety Administration recommends inspecting tires regularly after five years of service and notes that some manufacturers recommend replacement at six to ten years, regardless of remaining tread. Locate the Department of Transportation identification code on the sidewall to determine the manufacturing week and year.
Regional and Situational Checks
Can You Check Tread Wear Without a Gauge?
You can screen for severe wear without a gauge by checking molded wear bars or using a coin, but neither method provides a complete measurement. A no-tool check is useful before driving to a tire shop, while a $3-$10 manual gauge is the better choice for replacement planning and wear-pattern diagnosis.
Do Winter Tires Need More Tread?
Winter tires generally benefit from more remaining tread than summer tires because snow traction depends on groove depth and biting edges. Replace winter tires according to the manufacturer’s snow-performance guidance, and inspect for hardened rubber, missing sipes, and age in addition to depth.
Should You Rotate Tires to Fix Uneven Wear?
Rotation can distribute normal front-to-rear wear, but rotation cannot repair existing alignment, inflation, or suspension damage. Follow the vehicle and tire manufacturer’s rotation pattern, and correct the mechanical cause before moving a worn tire to another axle.
Does Tire Pressure Affect the Measurement?
Tire pressure changes the tread’s contact shape and can influence how wear develops, but pressure does not materially restore rubber that has already worn away. Measure tread depth as found, then correct cold pressure and continue recording readings to confirm that the pattern stops worsening.
FAQ
Is 4/32 Inch Tread Safe for Driving?
A 4/32-inch tire may remain legally usable in many places, but it has less wet-weather reserve than a new tire. Drivers facing frequent rain, standing water, high speeds, or winter travel should plan replacement at or before this measurement rather than waiting for the 2/32-inch legal limit.
How Do I Check the Inner Tread on a Rear Tire?
Use a flashlight and inspect through the wheel opening, or ask a tire shop to place the vehicle on a lift. Do not crawl under an unsupported vehicle. A tread gauge reading from the visible outer shoulder cannot represent the hidden inner edge if wear is uneven.
Can I Drive With a Nail in the Tread?
Do not remove a nail before professional inspection because the object may temporarily limit air loss. A repair may be possible when the puncture is in the central repair area and the internal damage is limited, but shoulder and sidewall punctures generally require tire replacement.
Does New Tread Guarantee Good Tires?
New tread does not guarantee a safe tire. Age-related cracking, impact damage, belt separation, incorrect load rating, prior run-flat operation, or an unsafe repair can make a tire hazardous even when its grooves measure near new depth.
How Long Does a Tread-Depth Check Take?
A visual check takes approximately 2-5 minutes for four tires, while a complete gauge inspection usually takes 10-20 minutes. The longer inspection includes three tread zones, multiple circumferential positions, sidewalls, pressure, and written readings.
Should All Four Tires Have the Same Tread Depth?
All four tires do not always wear at the same rate, but large differences can affect handling and all-wheel-drive operation. Compare the owner’s manual and drivetrain requirements, then ask a tire professional about permissible circumference or tread-depth differences before replacing only one tire.
The Bottom Line
To check tread wear correctly, inspect every tire for damage, measure the inner, center, and outer zones with a gauge, take readings around the circumference, and use the lowest reliable value. Treat 4/32 inch as a wet-weather replacement planning point and 2/32 inch as a common U.S. legal limit, not a performance goal. The most useful result combines tread depth with pressure, tire age, structural condition, and wear pattern.
Performing this complete inspection is more reliable than a single coin test or a glance at the outer tread. It identifies hidden alignment problems early and gives you a defensible basis for deciding whether to monitor, repair, or replace the tire.
Title tag: How to Check Tread Wear: The 4/32-Inch Safety Rule
Meta description: Use a tread gauge to inspect all four tires in 10-20 minutes, find hidden inner-edge wear, and decide whether 4/32 or 2/32 means replace.