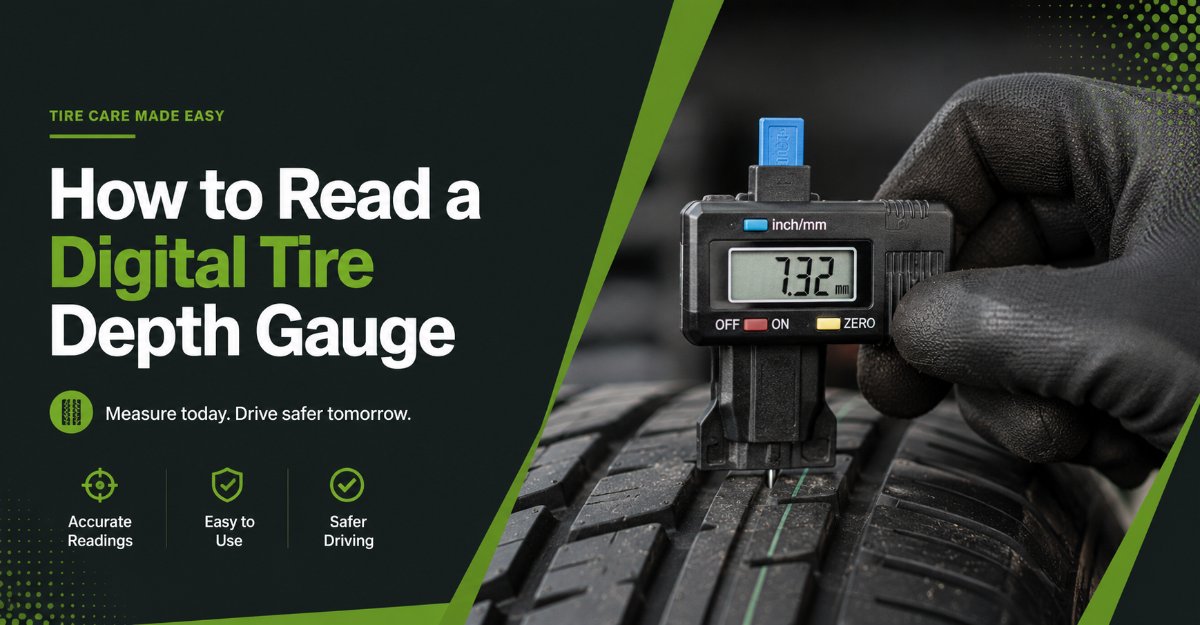
Learning how to read a digital tire depth gauge requires prepping the vehicle, calibrating the tool to zero, measuring three specific tread zones, and analyzing the numerical data. This five-minute beginner task successfully prevents high-speed hydroplaning. The single factor that most determines success is calibrating the probe perfectly flat against a hard surface.
Before You Start
- Time Required: 5 to 7 minutes for all four tires.
- Difficulty Level: Beginner.
- Cost Range: $10 to $25 for the tool.
- Tools and Materials Needed:
- Digital tire depth gauge: 1 unit.
- Replacement battery: 1 unit (CR2032 format).
- Flat calibration surface: 1 piece of smooth metal or thick glass.
- Clean microfiber cloth or rag: 1 unit.
- Small plastic pick or flathead screwdriver: 1 unit (for removing wedged rocks).
- Notepad and pen: 1 set (for recording measurements).
- Prerequisite Conditions: The vehicle must be parked on flat, stable ground with the parking brake fully engaged.
Phase 1: Preparation and Calibration
Step 1: Position the Vehicle and Expose the Tires
Turn the steering wheel to full lock in either direction to push the front tires out from under the wheel wells. You must have unobstructed physical access to the entire width of the tire tread. Turn the vehicle engine off and apply the emergency brake. Do not attempt this measurement on a slanted driveway or with the engine running.
- Success Checkpoint: You will know it worked when you can easily place your hands on the inner, center, and outer tread blocks of the front tires without contorting your wrists.
- Common Mistake: Attempting to measure front tires while they point straight ahead restricts your hand clearance, forcing you to hold the gauge at an improper angle.
Step 2: Clean the Tire Grooves Thoroughly
Wipe away all mud, dust, and debris from the primary circumferential grooves using a clean cloth. The primary grooves are the deep, continuous channels running completely around the tire. If small rocks or hardened debris are wedged into the rubber, pry them out carefully using a small plastic pick. You must clear a path down to the absolute bottom of the rubber valley.
- Success Checkpoint: You will know it worked when the bottom of the tire groove looks completely black and smooth under a flashlight.
- Common Mistake: Leaving a thin layer of compressed dirt at the bottom of the groove. This acts as a false floor and will give you an artificially shallow tread reading.
Step 3: Power On and Zero the Gauge
Press the ON/OFF button to power the unit, select your unit of measurement (millimeters or inches), and push the central probe flush with the base before pressing the ZERO button against a flat surface. Hold the plastic body of the gauge perfectly vertical against a piece of glass or a smooth metal plate. Push down firmly so the metal probe retracts completely and the plastic base sits perfectly flat against the glass. While holding this pressure, press the ZERO button until the LCD screen reads exactly 0.00.
- Success Checkpoint: You will know it worked when you lift the gauge off the glass, extend the probe slightly, press it back flat against the glass, and the screen perfectly returns to 0.00.
- Common Mistake: Calibrating the tool in the air. If you press the ZERO button while the probe is extended even a fraction of a millimeter, all subsequent tire measurements will be mathematically incorrect.
Phase 2: Execution and Analysis
Step 4: Position the Gauge and Extend the Probe
Place the flat plastic base of the gauge squarely across two adjacent tread blocks and push the slider down until the metal probe touches the bottom of the groove. You must ensure the probe lands in a clear section of the groove, actively avoiding the wear bars. Wear bars are the small, raised rectangular bumps of rubber molded horizontally across the bottom of the tire grooves. Hold the outer housing steady and apply light, even pressure to the top slider.
- Success Checkpoint: You will know it worked when the plastic base sits perfectly flush without wobbling, and the metal probe stops firmly against the solid rubber floor of the tire.
- Common Mistake: Dropping the probe directly onto a wear bar indicator. Because the wear bar is raised 1.6 mm above the base of the groove, measuring on top of it will trick you into thinking your tire is completely bald.
Step 5: Record and Analyze the Tread Measurements
Read the numbers on the LCD screen while keeping the gauge absolutely steady, and record the depths for the outer, center, and inner grooves of the same tire. A brand new passenger tire typically measures between 8.0 mm and 9.0 mm (10/32 to 11/32 inch). Compare your three numbers. If the numbers drop below the legal minimum of 1.6 mm (2/32 inch), the tire is illegal and highly dangerous. For safe winter driving, replace tires at 4.0 mm (5/32 inch).
- Success Checkpoint: You will know it worked when you have a written grid of 12 distinct numbers (three per tire, across four tires) to evaluate your vehicle’s safety footprint.
- Common Mistake: Pulling the gauge away from the tire before reading the screen. Retracting your hand often bumps the slider, changing the reading. Read the screen while the tool is still planted on the rubber.
Common Mistakes and How to Fix Them
Measuring at an Angle
If you hold the tool at a diagonal slant rather than perfectly perpendicular to the tire surface, the probe travels further to hit the bottom. This introduces geometric error, giving a falsely deep reading.
- How to fix it: Ensure both sides of the gauge base are making equal, flat contact with the rubber tread blocks. Use two hands: one to hold the base flat, and one to push the slider.
Pushing the Probe Too Hard
Tire rubber is flexible. If you jam the metal plunger downward with excessive force, the narrow tip will compress the rubber at the bottom of the groove, registering a deeper measurement than actually exists.
- How to fix it: Push the slider down only until you feel initial physical resistance. Let the tool do the work.
Dirty Capacitive Sensor Track
If your screen flashes wildly, drifts between random numbers while holding still, or freezes entirely, dust or grit has entered the sliding mechanism. Digital gauges use internal capacitive sensors that fail when contaminated.
- How to fix it: Fully extend the probe. Wipe the exposed metal slider arm thoroughly with a dry microfiber cloth. Retract and extend it several times to clear the internal housing, then recalibrate to zero.
Ignoring Uneven Wear Patterns
Writing down the numbers is useless if you ignore the story they tell. Finding a center groove that measures 3.0 mm while the outer grooves measure 6.0 mm is a mechanical failure, not just a tire issue.
- How to fix it: Diagnose the data immediately. Center wear indicates severe overinflation. Outer and inner edge wear indicates underinflation. Wear on only one side (e.g., inner measures 2.0 mm, outer measures 7.0 mm) dictates an immediate suspension alignment correction for extreme camber.
Process Variations for Different Situations
Measuring Dually Truck Tires
Heavy duty trucks with dual rear wheels require modified access. You cannot turn the steering wheel to expose rear tires.
- Variation: You must use a flashlight and approach the tires from the rear bumper. Because the inner tire is shielded, you will need a digital gauge with a locking set-screw or a “hold” button. Push the gauge into the inner tire groove blindly until flush, press the hold button, pull the tool out, and read the locked screen under better lighting.
Measuring Staggered Performance Tires
Many sports cars use wider rear tires than front tires, accompanied by aggressive negative camber for cornering grip.
- Variation: You cannot compare the front and rear tread depths to determine wear rates, as the rear tires will naturally wear up to twice as fast. Furthermore, you must take five measurements horizontally across the rear tires instead of three, as the extreme width creates more opportunities for hidden, localized inner-edge balding.
Measuring Motorcycle Tires
Motorcycle tires have curved profiles rather than flat contact patches, making it impossible to lay the flat base of the gauge across two blocks simultaneously.
- Variation: Position the gauge perpendicular to the curve of the tire. You must visually ensure the probe is dropping straight toward the center axle of the wheel, rather than angling off to the side. Take measurements directly in the center strip, as this is where 90 percent of upright commuting wear occurs.
Time and Cost Estimates
A comprehensive inspection of all four tires takes exactly 5 to 7 minutes. This accounts for 30 seconds of cleaning per tire, 30 seconds of measurement per tire, and moving around the vehicle. The only ongoing cost is the tool itself, which runs between $10 for a basic plastic digital model and $25 for an aluminum housing version, plus $2 to $5 annually for a fresh CR2032 lithium battery. Replacing the battery proactively every two years prevents acid leaks from destroying the internal circuit board.
Frequently Asked Questions
What does it mean if my digital gauge shows a negative number?
A negative number appears when the tool was zeroed incorrectly while the probe was slightly extended. To fix this, press the base firmly against a flat piece of glass, ensure the probe is fully retracted flush with the base, and press the ZERO button again.
Should I measure my tires in millimeters or inches?
Mechanics universally use 32nds of an inch (e.g., 6/32) in North America, but digital gauges calculate in decimal inches (e.g., 0.18 in). Select millimeters (mm) for the most intuitive, precise whole numbers. A reading of 4.5 mm is much easier to track than 0.177 inches.
How often should I check my tire tread depth?
Check your tread depth exactly once every 3,000 miles, or immediately before any road trip exceeding 500 miles. Recording this data monthly allows you to spot dangerous alignment issues before they ruin a $200 tire completely.
Does tire temperature affect the depth measurement?
Tire temperature has no measurable impact on tread depth. While heat causes the air inside the tire to expand and change the inflation pressure, the physical block of rubber does not swell enough to alter a digital depth gauge reading.
Why is my digital screen blank when I press the power button?
A blank screen indicates a dead battery, a reversed battery, or a loose contact. Slide open the top plastic compartment, verify the CR2032 battery is installed with the positive plus sign facing outward, and ensure the metal contact prongs are touching the battery casing.
Conclusion
Mastering how to read a digital tire depth gauge guarantees you are never caught driving on bald, dangerous rubber. By rigorously cleaning the grooves, calibrating on a flat surface, and taking multiple readings across the tire profile, you gain exact insights into both tire health and suspension alignment. Execute these steps monthly to maximize your tire lifespan and maintain absolute safety in wet conditions.