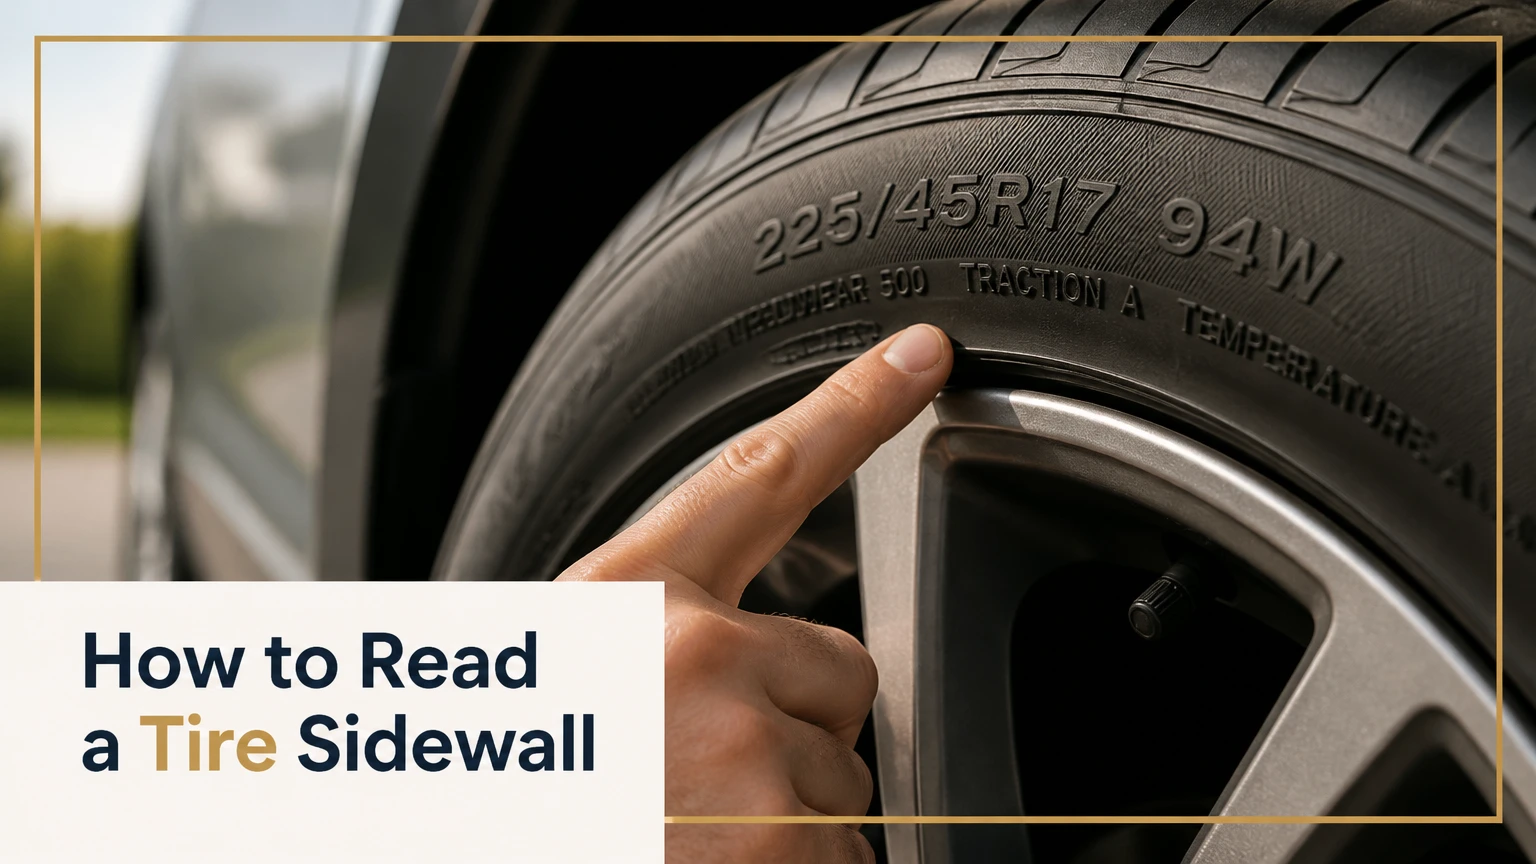
To learn how to read a tire sidewall, start with the large size code, such as P225/45R17 91V, then inspect the DOT date, load and pressure limits, weather symbols, construction labels, and mounting instructions. A complete check takes about five minutes and helps confirm fitment, age, capability, and safe replacement specifications.
At a Glance
- P225/45R17 91V identifies tire class, width, profile, construction, rim diameter, load index, and speed rating.
- The last four digits of the full DOT Tire Identification Number show the production week and year.
- The maximum pressure molded into the tire is not the vehicle’s normal inflation target.
- Replacement tires should meet the vehicle manufacturer’s required size, load capacity, and speed rating.
- M+S describes a tread-design category, while the three-peak mountain snowflake identifies tested snow performance.
- Sidewall bubbles, exposed cords, deep cuts, and impact damage require professional inspection or replacement.
Before You Start
Reading a tire sidewall requires no mechanical work, although some markings may face inward and be difficult to see. Use the vehicle placard as the controlling reference because a tire can fit the wheel physically while still having the wrong load capacity, speed capability, or inflation specification.
| Requirement | Typical value | Practical note |
| Inspection time | 3-5 minutes per vehicle | Allow longer if the full DOT code faces inward |
| Difficulty | Beginner | No wheel removal is normally required |
| Cost | $0 | A shop may inspect inaccessible markings |
| Tools | Flashlight, cloth, phone camera | Tire chalk can make shallow lettering easier to read |
| Primary reference | Driver-door placard | May also be on the door edge, fuel door, or owner’s manual |
| Tire condition | Parked and cool | Do not crawl under an unsupported vehicle |
Clean a small section of the sidewall with a damp cloth. Photograph each code instead of trying to remember it, especially when comparing four tires.
Step 1: Find the Vehicle’s Required Tire Specification
Locate the tire and loading placard before interpreting the tire itself. The placard normally lists the original front, rear, and spare tire sizes, seating capacity, recommended cold inflation pressure, and the vehicle’s combined occupant-and-cargo limit.
The placard matters because the sidewall describes the tire’s limits, not the vehicle’s requirements. Michelin and the U.S. Tire Manufacturers Association instruct drivers to follow the vehicle placard or manufacturer information when selecting tire size and inflation pressure.
Success checkpoint: The size on the installed tire matches the placard, or you have documentation showing that an approved alternate size was fitted.
Common mistake: Assuming that any tire mounted on the wheel is correct. Used vehicles may already have an unsuitable replacement size.
Step 2: Identify the Tire Type Prefix
Read the letters immediately before the width number. In P225/45R17, the letter P identifies a P-Metric passenger tire. A size with no prefix, such as 225/45R17, is generally a Euro-Metric designation rather than a shortened P-Metric code.
| Marking | Intended category | Typical application | Important restriction |
| P | P-Metric passenger tire | Cars, crossovers, light-duty SUVs | Load calculations differ slightly from Euro-Metric |
| No prefix | Euro-Metric passenger tire | Cars and crossovers | Do not assume identical capacity to a P-Metric tire |
| LT | Light-truck tire | Pickups, vans, towing applications | Often requires higher inflation pressure |
| ST | Special Trailer | Travel, utility, and boat trailers | Not intended for steering or passenger-car service |
| T | Temporary spare | Compact emergency spare | Restricted speed and distance |
| HL | High Load Capacity | Heavy EVs, hybrids, and SUVs | Must still match approved fitment |
| C after rim size | Commercial or reinforced format | Vans and European commercial vehicles | The C is not automatically a load-range letter |
High Load Capacity tires use an HL prefix and can carry more load at the same size and inflation pressure than some conventional alternatives, which can be useful for heavier electric vehicles.
Success checkpoint: The tire category suits the vehicle and its use.
Common mistake: Treating ST, LT, P-Metric, and Euro-Metric tires as interchangeable because their width and rim numbers match.
Step 3: Read the Section Width
The first three-digit number is the nominal section width in millimeters. A 225 tire is approximately 225 mm wide from its widest outer sidewall point to its widest inner sidewall point when measured on a specified reference rim.
Section width is not tread width. It is also not an exact mounted measurement. Wheel width, tire pressure, load, sidewall design, and manufacturing tolerance can make the installed tire slightly wider or narrower.
For a quick conversion:
225 mm ÷ 25.4 = 8.86 inches
A wider replacement may contact a suspension arm or fender even when its rim diameter is correct. Confirm approved wheel-width and clearance ranges before changing sizes.
Success checkpoint: The width number matches the placard or an approved alternate-size calculation.
Common mistake: Buying a tire because the tread appears similar in width.
Step 4: Calculate the Aspect Ratio
The number after the slash is the sidewall aspect ratio. In 225/45R17, the sidewall height is 45 percent of the nominal 225 mm width.
225 × 0.45 = 101.25 mm
The aspect ratio is not a direct millimeter measurement. A 45-series tire in a 245 mm width has a taller sidewall than a 45-series tire in a 205 mm width.
| Tire size | Width | Aspect ratio | Calculated sidewall height |
| 205/55R16 | 205 mm | 55% | 112.75 mm |
| 225/45R17 | 225 mm | 45% | 101.25 mm |
| 235/40R18 | 235 mm | 40% | 94.00 mm |
| 265/70R17 | 265 mm | 70% | 185.50 mm |
Changing the aspect ratio changes overall diameter, gearing, ride height, speedometer readings, ground clearance, and wheel-well clearance. A lower number generally produces a shorter sidewall only when width remains equal.
Success checkpoint: The width and aspect-ratio combination gives an approved overall diameter.
Common mistake: Comparing aspect ratios without considering tire width.
Step 5: Identify the Internal Construction
The letter before the rim diameter describes internal construction. R means radial construction, the standard design for modern passenger and light-truck tires. D identifies diagonal or bias-ply construction, while B identifies belted-bias construction.
Do not mix radial and bias-ply tires unless a vehicle or equipment manufacturer explicitly permits it. Their sidewall flex, heat generation, steering response, and load behavior differ.
A performance size may use ZR, such as 245/40ZR18. The Z indicates a high-speed category, while the final service-description letter, such as W or Y, provides the more specific speed rating.
Success checkpoint: Construction matches the vehicle requirement and the other tires on the axle.
Common mistake: Reading the R as “rim.” R describes radial construction. The following number identifies rim diameter.
Step 6: Confirm the Rim Diameter
The number following R, D, or B is the wheel diameter in inches. A 225/45R17 tire fits a 17-inch wheel.
The figure does not describe the complete outside diameter of the tire. A 17-inch tire cannot safely mount on a 16-inch or 18-inch wheel, even if the tire looks close to the wheel’s size.
Some specialty sizes use uncommon rim-diameter conventions. Standard passenger-car replacements should be matched exactly to the wheel specification.
Success checkpoint: The tire’s rim-diameter number exactly matches the wheel diameter.
Common mistake: Measuring across the outer edge of the wheel and expecting exactly 17 inches. Wheel diameter is measured at the tire’s bead-seat area, not the outer flange.
Step 7: Decode the Load Index
The number following the rim diameter is the load index. In 225/45R17 91V, the load index is 91, which corresponds to 615 kg or 1,356 lb per tire under specified conditions.
The load index must be checked against a standardized table. It is not the number of pounds, kilograms, or tire plies.
| Load index | Maximum load per tire | Approximate pounds | Four-tire theoretical total |
| 88 | 560 kg | 1,235 lb | 4,940 lb |
| 91 | 615 kg | 1,356 lb | 5,424 lb |
| 94 | 670 kg | 1,477 lb | 5,908 lb |
| 97 | 730 kg | 1,609 lb | 6,436 lb |
| 100 | 800 kg | 1,764 lb | 7,056 lb |
| 104 | 900 kg | 1,984 lb | 7,936 lb |
A simple four-tire multiplication is not a substitute for vehicle axle ratings, weight distribution, inflation tables, or dual-tire rules. Replacement tires should meet or exceed the manufacturer’s required load index. Michelin notes that higher load-index numbers indicate greater carrying capacity and recommends equivalent or higher capacity for replacements.
XL means Extra Load. SL means Standard Load. Light-truck tires may show a load range such as C, D, or E, plus single and dual maximum-load values.
Success checkpoint: The replacement load index meets or exceeds the placard or manufacturer specification.
Common mistake: Choosing a lower load index because the vehicle is rarely fully loaded.
Step 8: Decode the Speed Rating
The final letter in the service description is the speed rating. A V-rated tire is tested for a higher maximum speed category than an H- or T-rated tire, but the symbol is not permission to drive at that speed.
| Rating | Maximum test-category speed | Approximate mph | Common application |
| Q | 160 km/h | 99 mph | Some winter and off-road tires |
| S | 180 km/h | 112 mph | Older passenger and light-truck applications |
| T | 190 km/h | 118 mph | Touring and commuter tires |
| H | 210 km/h | 130 mph | Sedans and crossovers |
| V | 240 km/h | 149 mph | Performance touring |
| W | 270 km/h | 168 mph | High-performance vehicles |
| Y | 300 km/h | 186 mph | Ultra-high-performance vehicles |
The rating applies when the tire is properly inflated, correctly loaded, undamaged, and operated under specified test conditions. Michelin defines the speed symbol as the speed category at which the tire can carry its indexed load under stated service conditions.
Use a replacement rating that meets the vehicle manufacturer’s specification. Winter-tire exceptions may be permitted in some markets, but they can require a dashboard reminder or lower operating-speed limit.
Success checkpoint: The speed rating meets the vehicle specification and matches the intended use.
Common mistake: Believing a high rating guarantees better wet grip, braking, or tread life. Those are separate characteristics.
Step 9: Read the DOT Tire Identification Number
Find the letters DOT followed by a sequence of letters and numbers. This is the Tire Identification Number, or TIN. The final four digits of a modern full TIN identify the manufacturing week and year.
For example:
DOT XXXXXXXX 3224
- 32 means the 32nd production week.
- 24 means 2024.
NHTSA confirms that the last four digits identify the week and year of manufacture. It also notes that the full code may appear on only one side, so checking both sidewalls may be necessary.
All tires sold in the United States have a TIN beginning with DOT. A full TIN appears on one sidewall, while the opposite side may carry a partial TIN.
The DOT symbol represents the manufacturer’s self-certification of compliance with applicable federal safety standards. It is not a separate government approval stamp.
What About Three-Digit Date Codes?
Tires made before 2000 may use a three-digit date code. Those tires are now too old for normal road service, regardless of remaining tread.
How Old Is Too Old?
NHTSA states that some vehicle and tire manufacturers recommend replacement after six to 10 years regardless of treadwear. Follow the earliest limit specified by the tire maker or vehicle manufacturer and have aging tires inspected.
Success checkpoint: All four tires have readable dates and acceptable age, condition, and service history.
Common mistake: Reading 3224 as March 2, 2024. Tire dates use week and year, not month and day.
Step 10: Understand UTQG Grades
Uniform Tire Quality Grading normally shows three values: treadwear, traction, and temperature. A marking may read TREADWEAR 500 TRACTION A TEMPERATURE A.
| UTQG element | Example | What it evaluates | What it does not guarantee |
| Treadwear | 500 | Relative wear in a controlled comparison | Exact mileage or years of service |
| Traction | AA | Straight-line wet braking on specified surfaces | Cornering, hydroplaning, snow, or ice grip |
| Temperature | A | Heat resistance and dissipation | Protection from underinflation or overload |
| No UTQG marking | Some winter or specialty tires | Category may be exempt | Poor quality cannot be assumed |
A treadwear grade of 500 does not automatically mean 50,000 miles. Grades are most useful when comparing tires within the same manufacturer because compounds, testing practices, alignment, pressure, rotation, road surface, climate, and driving style affect actual wear.
Traction grades run from AA to C. Temperature grades run from A to C. These grades cover limited test conditions and should not replace independent braking, handling, or winter-performance data.
Success checkpoint: You understand the grade as a comparative indicator, not a warranty.
Common mistake: Selecting the highest treadwear grade without considering grip, climate, ride, noise, or braking priorities.
Step 11: Check Weather and Traction Symbols
The sidewall may carry M+S, the three-peak mountain snowflake, or an ice-grip symbol. These markings do not all represent the same testing threshold.
| Symbol | Meaning | Test basis | Best interpretation |
| M+S, M/S, M&S | Mud and snow designation | Primarily tread-geometry criteria | Basic all-season or traction-oriented design |
| 3PMSF | Three-peak mountain snowflake | Standardized snow-acceleration performance | Verified severe-snow capability |
| Ice-grip symbol | Ice-performance classification | Applicable standardized ice test | Specialized winter capability |
| Studdable | Accepts approved studs | Tire-specific construction | Check local laws before stud installation |
The three-peak mountain snowflake is a stronger winter-performance indicator than M+S alone. However, a snow symbol does not eliminate braking-distance limits on ice, the need for suitable tread depth, or the effect of warmer temperatures on soft winter compounds.
Success checkpoint: The symbol matches the climate and legal requirements where the vehicle operates.
Common mistake: Assuming every M+S tire is a dedicated winter tire.
Step 12: Read Pressure, Load, and Ply Information
The sidewall lists a maximum load and maximum cold inflation pressure. These figures describe the tire’s upper structural limits under defined conditions. They are not the everyday settings for your vehicle.
Use the driver-door placard for routine cold pressure. The USTMA specifically directs drivers to follow the vehicle placard, certification label, or owner’s manual rather than using the maximum sidewall pressure as the normal target.
A light-truck tire may also display:
- Load Range C, D, E, F, or another designation
- Maximum single load
- Maximum dual load
- Cord materials in tread and sidewall
- Ply rating or equivalent strength classification
“10-ply rated” does not necessarily mean the tire contains 10 physical plies. Modern materials achieve equivalent strength with fewer actual layers.
Success checkpoint: Inflation follows the vehicle or approved load-and-inflation specification.
Common mistake: Inflating every tire to the maximum PSI printed on its sidewall.
Step 13: Check Mounting and Special-Use Markings
Directional, asymmetrical, run-flat, and manufacturer-approved tires carry additional instructions. Ignoring them may reduce drainage, handling, noise control, or emergency mobility.
| Marking | Meaning | Required action |
| Rotation arrow | Directional tread | Mount so the arrow points forward during vehicle travel |
| Outside / Inside | Asymmetrical tread | Keep the correct side facing outward |
| RFT, ROF, ZP, SSR or similar | Run-flat technology | Confirm wheel, TPMS, vehicle, and replacement compatibility |
| OE symbols such as *, N0, MO or T-markings | Automaker-approved specification | Match the approved version when required |
| Tubeless | Designed without an inner tube | Use a compatible wheel and valve |
| Regroovable | Tread designed for regulated regrooving | Usually commercial service, not a DIY procedure |
Directional tires display an arrow on the sidewall showing the required rolling direction.
Automaker-specific markings can identify tires developed and validated for particular vehicle requirements. Michelin describes such markings as evidence that a tire was jointly developed and approved for a vehicle manufacturer’s performance objectives.
Success checkpoint: Every directional, inside/outside, run-flat, and OE marking is correctly applied.
Common mistake: Installing an asymmetrical tire correctly on the wheel but placing that wheel on the wrong side because the installer mistakes it for a directional tire.
Common Mistakes and How to Fix Them
Using Maximum Pressure as Recommended Pressure
Problem: The driver inflates the tire to the number molded beside “MAX PRESS.”
Fix: Set cold pressure according to the door placard. Recheck after the vehicle has been parked long enough for the tires to cool.
Matching Only the First Three Numbers
Problem: A replacement matches 225/45R17 but has a lower load index or speed rating.
Fix: Compare the complete service description, load class, XL or SL marking, and vehicle specification.
Reading the Partial DOT Code
Problem: The visible code has no four-digit date.
Fix: Inspect the opposite sidewall. The full TIN and production date may face inward.
Assuming Tread Depth Makes an Old Tire Safe
Problem: An infrequently driven tire has deep tread but substantial age, cracking, or oxidation.
Fix: Check the DOT date and condition together. Arrange professional inspection when the age approaches the manufacturer’s limit.
Mixing Different Tire Types on One Axle
Problem: The axle carries different sizes, constructions, load classes, tread patterns, or performance categories.
Fix: Use matching tires across an axle. For all-wheel-drive vehicles, follow the manufacturer’s circumference and tread-depth limits across all four positions.
Ignoring Sidewall Damage
Problem: The driver decodes the markings but overlooks a bubble, cut, exposed cord, or impact break.
Fix: Stop using a tire with a bulge or exposed structure. Sidewall injuries generally cannot be repaired like a qualifying tread-area puncture. Proper puncture inspection requires removing the tire from the wheel.
Tire Sidewall Examples
| Sidewall code | Plain-language interpretation | Likely use |
| P225/45R17 91V | Passenger tire, 225 mm wide, 45 profile, radial, 17-inch wheel, 615 kg, 149 mph category | Performance sedan |
| 205/55R16 91H | Euro-Metric, 205 mm wide, 55 profile, radial, 16-inch wheel, 615 kg, 130 mph category | Compact or midsize car |
| LT265/70R17 121/118S E | Light-truck tire, dual load indexes, S speed rating, Load Range E | Pickup or towing application |
| T125/70D16 96M | Temporary spare, narrow width, bias construction, 16-inch wheel | Emergency use only |
| HL275/40R22 108Y XL | High-load tire, 22-inch wheel, high load and speed capability | Heavy performance EV or SUV |
| 35×12.50R20LT | Approximate 35-inch flotation size, 12.5-inch width, radial, 20-inch wheel | Off-road truck |
Flotation-size dimensions are nominal. Actual overall diameter and width vary by model and approved measuring rim.
Can You Change to a Different Tire Size?
A different size may be safe only when wheel compatibility, load capacity, overall diameter, clearance, speedometer calibration, braking systems, stability control, and manufacturer restrictions are checked together. Matching rim diameter alone is insufficient.
A common sizing rule keeps overall diameter close to the original, often within approximately 3 percent, but that rule is only an initial screening tool. Some vehicles tolerate less variation, while others require specific load, OE, or rolling-circumference characteristics.
Consult a qualified tire professional before:
- Increasing wheel diameter
- Installing wider tires
- Changing from P-Metric to LT
- Replacing run-flats with conventional tires
- Modifying an all-wheel-drive vehicle
- Fitting tires with lower load or speed ratings
Time and Cost Expectations
Reading tire markings costs nothing and normally takes under five minutes. Costs arise only when the code reveals a problem that requires inspection, dismounting, balancing, correction, or replacement.
| Service | Typical time | Typical cost category | When it may be needed |
| Self-check | 3-5 minutes | Free | Routine monthly inspection |
| Shop visual inspection | 10-20 minutes | Often free or low cost | Unclear age, cracking, unusual wear |
| Dismounted internal inspection | 20-45 minutes | Labor charge | Impact, puncture, or suspected internal damage |
| Mount and balance one tire | 20-40 minutes | Labor plus supplies | Replacement or incorrect mounting |
| Four-tire replacement | 60-120 minutes | Tires, installation, disposal, possible alignment | Age, wear, damage, or incorrect specification |
Actual tire prices vary widely by size, category, load class, speed rating, brand, warranty, and local labor. Sidewall codes help narrow the specification, but they do not show compound quality, independent test performance, noise, warranty terms, or price.
Expert Rules of Thumb
Read the whole specification, not the size alone. Two tires marked 225/45R17 may differ in load index, speed rating, load class, winter certification, run-flat technology, and OE approval.
Treat the vehicle placard as the starting authority. The tire sidewall tells you what the tire is capable of. The placard tells you what the vehicle requires.
Inspect all four tires individually. Vehicles often carry mixed production dates after puncture replacements or axle-only tire changes. The oldest tire determines when age becomes a concern.
Limitations of Sidewall Information
A tire sidewall cannot tell you whether the tire has hidden impact damage, improper internal repairs, belt separation, vibration under load, excessive road-force variation, or degradation caused by chronic underinflation. It also cannot predict exact tread life or wet-braking distance.
Sidewall decoding is therefore a screening method, not a complete safety inspection. Unusual vibration, air loss, cracking, bulges, exposed material, pull, noise, or impact history requires professional evaluation.
Frequently Asked Questions
Where is the tire manufacture date?
The manufacture date is the final four digits of the full DOT Tire Identification Number. The first pair identifies the production week and the second pair identifies the year. A code ending in 1425 means the tire was produced during the 14th week of 2025.
Why can’t I find the DOT date on my tire?
The full Tire Identification Number may be molded only on one sidewall, while the visible side shows a partial code. Turn the steering wheel for better access to front tires or inspect the inward-facing side safely. Never crawl beneath a vehicle supported only by a jack.
What does XL mean on a tire?
XL means Extra Load. An XL tire is engineered to carry more load at a specified higher inflation pressure than a comparable Standard Load tire. XL does not mean the tire fits every heavy vehicle. Its exact size, load index, pressure requirements, and vehicle approval must still match.
Is a higher speed rating always better?
A higher speed rating identifies a higher tested speed category under specified load and inflation conditions. It does not automatically provide better snow traction, comfort, tread life, puncture resistance, or fuel economy. Choose a rating that meets the vehicle specification and suits the intended tire category.
Can I replace a 91V tire with a 94W tire?
A 94W tire has a higher load index and speed rating than a 91V tire, but those two values do not prove full compatibility. The replacement must also match approved size, load class, wheel width, pressure, overall diameter, construction, clearance, and any automaker-specific requirement.
Does the DOT symbol mean the government tested my tire?
The DOT symbol means the manufacturer certifies that the tire complies with applicable U.S. federal motor vehicle safety standards. NHTSA has clarified that the marking represents manufacturer self-certification, not an individual approval or performance endorsement issued by the agency.
The Bottom Line
Learning how to read a tire sidewall means decoding the complete tire specification, not just identifying the width and wheel diameter. Check the vehicle placard first, then read the type, width, aspect ratio, construction, rim size, load index, speed rating, DOT date, pressure limits, weather symbols, and mounting instructions.
A correct sidewall reading helps prevent incompatible replacements, overloading, incorrect inflation, age-related surprises, and mounting errors. It cannot detect every internal problem, so combine the code check with tread, pressure, damage, wear, and professional inspection when anything appears abnormal.