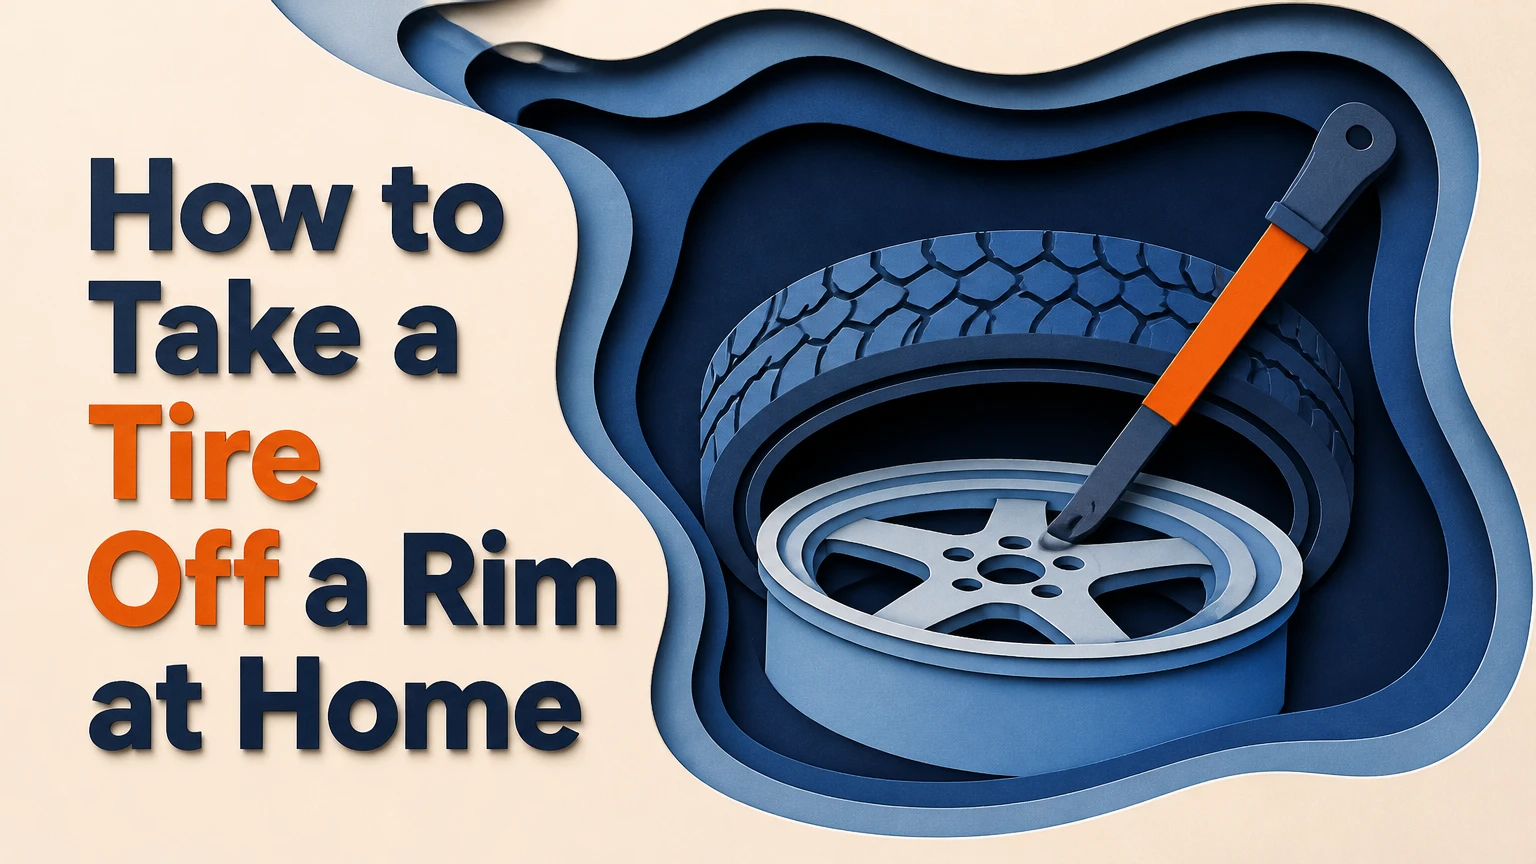
To take a tire off a rim at home, completely deflate the tire, break the bead on both sides, lubricate the bead and rim, and use two or three tire spoons to lift each bead over the wheel flange. A typical first attempt takes 30-60 minutes, and success depends mainly on keeping the opposite bead inside the rim’s drop center.
Important safety limit: This guide applies to ordinary single-piece passenger-car, trailer, lawn-equipment, motorcycle, and similar wheels. Do not attempt to dismantle multi-piece truck rims, split rims, visibly damaged wheels, or unfamiliar commercial assemblies at home.
Key Facts at a Glance
- The valve core must be removed so the tire reaches 0 PSI before bead breaking begins.
- Both tire beads must be separated from their bead seats before either bead can be pried over the rim.
- The section opposite the tire spoons must remain inside the wheel’s drop center.
- Two tire spoons are the minimum practical number, while three provide better control.
- Dedicated tire-mounting lubricant is safer for rubber than petroleum-based oil or grease.
- Low-profile, run-flat, and expensive alloy-wheel assemblies are usually better handled by a tire shop.
Before You Start
Removing a tire manually is a moderate-to-difficult DIY task. Standard steel wheels and flexible, high-sidewall tires are the easiest. Large truck tires, run-flat tires, stiff low-profile tires, and wheels fitted with sensitive direct TPMS hardware require more force and carry a higher risk of damage.
| Planning factor | Typical requirement | Practical note |
| Time for a beginner | 30-60 minutes per tire | Rust and stiff sidewalls can extend the job |
| Experienced DIY time | 10-25 minutes per tire | Assumes proper tools and a broken-in technique |
| Basic tool cost | $25-$80 | Valve tool, spoons, protectors, lubricant |
| Manual changer setup | $60-$180 | Often needs floor or pallet mounting |
| Professional removal | $15-$45 per tire | Disposal, TPMS, or mounting may cost extra |
| Difficulty | Moderate to high | Low-profile and run-flat tires are much harder |
Tools and Materials
| Tool or material | Recommended quantity | Purpose |
| Valve-core removal tool | 1 | Releases all internal air |
| Tire spoons or tire irons | 2 minimum, 3 preferred | Lifts the bead over the rim flange |
| Bead breaker | 1 | Separates the bead from the bead seat |
| Rim protectors | 2-4 | Protects painted or alloy wheel lips |
| Tire-mounting lubricant | 8-16 ounces | Reduces friction and bead damage |
| Rubber mallet | 1 | Provides controlled tapping when needed |
| Gloves | 1 pair | Protects against pinches and sharp wire |
| Safety glasses | 1 pair | Protects against valve cores and slipping tools |
| Wood blocks or rubber mat | 2-4 | Stabilizes and protects the wheel |
Use purpose-built tire spoons with smooth, rounded ends. Screwdrivers, sharp pry bars, chisels, and construction wrecking bars concentrate force on a small area and can gouge the wheel or cut the tire bead.
How Does a Tire Stay on the Rim?
A tire remains attached because its two reinforced beads sit against shaped bead seats near the outside edges of the wheel. Air pressure pushes the beads outward, creating a tight mechanical and airtight interface between the tire and wheel.
The center portion of most single-piece wheels has a smaller diameter than the bead-seat area. This recessed channel is called the drop center. During removal, pushing one side of the bead into the drop center creates enough circumference on the opposite side to lift the bead over the wheel flange.
That geometry matters more than brute strength. When a tire spoon bends heavily but the bead barely moves, the opposite side is usually sitting on the bead seat instead of inside the drop center.
Step 1: Deflate the Tire Completely
Remove the valve cap, place the valve-core tool inside the stem, and rotate it counterclockwise until the core comes free. Keep your face away from the stem and control the tool because the escaping air can eject the core.
Wait until airflow stops. Press the sidewall and verify that no trapped pressure remains. OSHA’s single-piece rim-wheel procedure states that tires must be “completely deflated by removal of the valve core” before demounting.
Check for a TPMS Sensor
Many modern passenger vehicles use a direct tire-pressure monitoring sensor attached to the valve stem. The sensor usually extends several inches inside the wheel.
Mark the valve-stem position with tape or chalk. Avoid placing the bead breaker directly over that location, and avoid inserting a tire spoon deeply beside the stem. A metal spoon can crack the sensor housing or tear it away from the valve.
Success checkpoint: The tire is soft on both sidewalls, no air exits the valve stem, and the valve core is physically removed.
Common mistake: Pressing the valve pin to release most of the air but leaving the core installed. Residual pressure can keep the bead tight and create unnecessary risk.
Step 2: Break the Bead on Both Sides
Apply tire lubricant around the point where the sidewall meets the wheel. Position the bead-breaker shoe on the tire close to the rim, but not on the metal flange or sidewall lettering area.
Apply steady pressure until the bead moves away from the bead seat and drops inward. Rotate the wheel and repeat at several positions if the bead releases only partially. Turn the assembly over and break the second bead in the same way.
The bead is fully broken only when both tire edges can move independently around the entire circumference. One released section is not enough.
Which Bead-Breaking Method Works Best?
| Method | Typical cost | Effort | Wheel-damage risk | Best use |
| Dedicated bead breaker | $50-$150 | Low to moderate | Low when positioned correctly | Regular DIY work |
| Manual tire changer | $60-$180 | Moderate | Low to moderate | Multiple tires |
| Bench vise method | Existing equipment | Moderate | Moderate | Small wheels only |
| Jack-and-frame method | Existing equipment | Moderate | Moderate to high | Emergency workshop use |
| Vehicle-weight method | Minimal | High risk | High | Not recommended |
A dedicated bead breaker is the most predictable home method. A floor-mounted manual changer is useful when several tires must be removed, but the base must be securely bolted to concrete or a heavy wooden platform.
Avoid driving a vehicle onto the sidewall. The tire can shift, the wheel can bend, the vehicle can slip from the support, and the rim may be crushed before the bead releases.
Success checkpoint: Both beads can be pushed toward the wheel’s center by hand at every point.
Common mistake: Applying force far from the wheel edge. The sidewall collapses, but the bead remains seated.
Step 3: Lubricate the Beads and Wheel Lip
Apply a thin, continuous coating of commercial tire lubricant to both beads and the wheel flange. Work lubricant into dry or rusty areas where the bead still drags.
OSHA specifies nonflammable rubber lubricant for bead and wheel mating surfaces unless the manufacturer advises otherwise. USTMA also publishes specific guidance on tire bead lubricants and mounting aids.
A diluted dish-soap solution is commonly used for occasional DIY removal, but dedicated tire lubricant is preferable. It provides better slip, dries more predictably, and is formulated for contact with tire rubber.
Do not use engine oil, penetrating oil, gasoline, brake cleaner, silicone spray, or petroleum grease. These substances may attack rubber, contaminate a repair area, leave the bead slippery after installation, or create a fire hazard.
Success checkpoint: The bead and flange feel uniformly slick, with no dry section around the circumference.
Common mistake: Lubricating only the section being pried. The dry portion then binds and removes the slack needed at the working point.
Step 4: Pry the First Bead Over the Rim
Lay the wheel flat with the narrow-ledge side facing upward. Most wheels should be demounted from this side because it is closer to the drop center. OSHA likewise specifies demounting single-piece rim wheels from the narrow-ledge side.
Place a rubber mat or wooden blocks beneath the wheel so the face does not contact concrete. Position rim protectors at the working edge if the wheel is painted, polished, or made from aluminum alloy.
Push the side of the tire opposite your body into the drop center. Kneel on the sidewall or use a clamp to keep it there.
Insert the curved end of the first tire spoon beneath the bead. The spoon needs to catch the reinforced bead, not merely the flexible sidewall. Lever the handle toward the center of the wheel until a short bead section crosses the flange.
Hold the first spoon in place. Insert the second spoon about 3-5 inches away and lift the next section. Move in small increments around the wheel while continually pushing the opposite bead into the drop center.
Large jumps make the bead excessively tight. Small movements keep the load controlled and reduce the chance of tearing rubber or scratching the wheel.
Success checkpoint: Approximately one-third of the first bead sits outside the flange. At that point, the remaining bead often pulls over by hand or with one additional spoon movement.
Common mistake: Placing spoons 8-12 inches apart. The bead must stretch too far, causing excessive resistance and tool slippage.
Step 5: Remove the Second Bead
Stand the loosened tire upright or lift it at an angle so the remaining bead approaches the same wheel flange used for the first bead. Lubricate the lower bead again if it has dried.
Keep the valve-stem area visible. Insert a protected tire spoon beneath the second bead on the side opposite a direct TPMS sensor. Lever the bead over the upper flange while pushing the wheel downward and away from the tire.
Once a section crosses the flange, rotate the assembly and continue with short, controlled movements. On flexible tires, lifting the tire while pushing the wheel downward may free the remaining bead without another full pass.
A rubber mallet may be used to tap the tire sidewall or the protected edge of the bead. Do not strike an exposed alloy flange with a steel hammer.
Success checkpoint: The wheel slides completely out of the tire without tearing, cracking, or permanently deforming either bead.
Common mistake: Pulling the tire straight upward while the lower bead remains on the wider side of the wheel. Reposition the assembly so both beads leave over the narrow-ledge side.
Inspect the Tire, Rim, and TPMS Components
Inspect the tire beads immediately after removal. Look for exposed bead wire, torn rubber, deep spoon cuts, stretched sections, or chunks missing from the bead toe. A damaged bead may not seal or remain safely seated after remounting.
Inspect the wheel for:
- Bent or flattened flanges
- Cracks around spokes or bolt holes
- Heavy corrosion on the bead seat
- Sharp burrs or gouges
- Peeling chrome or paint
- Damage around the valve opening
- Loose or broken TPMS hardware
Cracked, bent, or otherwise damaged wheel components should not be repaired by heating, welding, or reshaping as a casual DIY project. OSHA prohibits heating and reworking damaged single-piece wheels in covered workplace servicing.
Common Mistakes and How to Fix Them
| Problem | Likely cause | Corrective action |
| Bead will not separate | Valve core installed or corrosion present | Remove core, reapply lubricant, work around the full circumference |
| Spoon bends heavily | Opposite bead is outside the drop center | Stop prying and press the opposite side inward |
| Wheel lip gets scratched | No protector or sharp tool used | Add plastic protectors and use rounded tire spoons |
| Bead keeps slipping back | First spoon is not retained | Leave one spoon locked while advancing another |
| TPMS sensor breaks | Tool inserted beside valve stem | Mark the sensor area and begin farther away |
| Tire bead tears | Excessive force or large spoon spacing | Lubricate again and move in 3-5-inch increments |
| Second bead will not clear | Tire is leaving over the wrong wheel side | Reorient it toward the narrow-ledge side |
| Rusted bead remains stuck | Corrosion bonds rubber to the seat | Soak with approved lubricant and use a proper bead breaker |
Why Is the Drop Center So Important?
The drop center reduces the effective diameter the bead must travel around. Without that reduction, the bead is being forced over a flange whose circumference is too large for easy manual removal.
A practical rule is simple: when force rises suddenly, stop. Do not add a longer bar first. Check whether the opposite 120-180 degrees of bead is fully pressed into the wheel’s center channel.
Can You Use Screwdrivers Instead of Tire Spoons?
A screwdriver may physically lift a bead, but it is a poor tire-removal tool. Its sharp edges can cut bead rubber, puncture an inner liner, slip toward the user, and gouge the rim.
A basic set of two or three tire spoons usually costs less than repairing a painted wheel or replacing a tire with bead damage. Plastic rim protectors provide further protection but cannot make a sharp screwdriver safe.
Which Tires Should Not Be Removed at Home?
Professional service is the safer choice when the assembly requires controlled force, specialized clamping, or manufacturer-specific handling.
| Tire or wheel type | Why manual removal is difficult | Recommended action |
| Run-flat tire | Reinforced sidewalls resist flexing | Use a shop experienced with run-flats |
| Low-profile performance tire | Short, stiff sidewall offers little movement | Use a protected or touchless changer |
| Large light-truck tire | Heavy assembly and strong bead | Use commercial tire equipment |
| Expensive alloy wheel | Cosmetic damage is costly | Use a rim-protecting machine |
| Multi-piece or split rim | Components can separate violently | Use trained professional service |
| Damaged or heat-exposed wheel | Structural condition is uncertain | Stop and have the assembly inspected |
| Tire with unknown internal damage | Bead or cords may already be compromised | Seek professional assessment |
USTMA provides separate service guidance for self-supporting run-flat and extended-mobility tires, which reflects their specialized construction and mounting requirements.
How Long Does DIY Tire Removal Take?
A first-time removal usually takes 30-60 minutes for one ordinary passenger tire. A flexible trailer, lawnmower, or motorcycle tire may take 15-30 minutes, while an old tire bonded to a corroded steel rim can take longer than an hour.
| Situation | Typical removal time | Main delay |
| Small lawn-equipment tire | 15-30 minutes | Limited working space |
| Standard passenger tire | 30-60 minutes | Bead breaking and technique |
| Trailer tire | 20-45 minutes | Stiff load-rated construction |
| Low-profile tire | 45-90+ minutes | Short, rigid sidewall |
| Rusted steel wheel | 45-90+ minutes | Corrosion at bead seat |
| Manual changer, experienced user | 10-25 minutes | Setup and wheel anchoring |
The first tire takes the longest because the user is learning how the drop center changes leverage. After the technique becomes familiar, physical effort and completion time usually decrease.
Is DIY Removal Cheaper Than a Tire Shop?
DIY removal is economical when you already own the tools or plan to service several simple wheels. A valve tool, tire spoons, protectors, and lubricant typically cost $25-$80, while a manual changing stand can raise the initial investment to approximately $60-$180.
A shop may charge roughly $15-$45 per tire for basic demounting, although local labor rates, tire size, disposal, TPMS service, balancing, and remounting change the final amount.
Professional service is often the better financial decision for one set of premium wheels. One damaged alloy rim, torn bead, or broken TPMS sensor can cost more than the entire shop bill.
Frequently Asked Questions
Can I remove a car tire without a bead breaker?
Yes, but a proper bead breaker makes the job safer and more predictable. A securely mounted manual tire changer or correctly arranged press can also work. Avoid vehicle-weight tricks because the wheel can bend, the support can shift, and the bead may release suddenly.
Is soapy water safe for removing a tire?
A mild water-and-dish-soap mixture can provide temporary lubrication for occasional removal, but commercial tire lubricant is preferable. Dedicated lubricant is formulated for rubber, spreads evenly, and leaves less harmful residue. Never substitute petroleum oil, gasoline, brake cleaner, or flammable solvent.
Should the valve core always be removed?
Yes. Removing the valve core allows the tire to reach 0 PSI and prevents trapped air from resisting bead-breaking pressure. Merely pressing the valve pin may release most air, but it does not provide the same visual confirmation that the assembly is fully depressurized.
Can a tire be reused after manual removal?
A tire may be reused when both beads, the inner liner, sidewalls, and tread structure remain undamaged and the tire is otherwise serviceable. Exposed bead wire, torn rubber, deep tool cuts, sidewall cracking, or internal damage are reasons to stop and have the tire inspected.
How do I avoid damaging an alloy rim?
Use plastic rim protectors, rounded tire spoons, abundant tire lubricant, and small 3-5-inch lever movements. Keep the wheel face on a padded surface. Most importantly, maintain the opposite bead inside the drop center so excessive force is unnecessary.
Do I need to rebalance the wheel afterward?
Yes, when a tire is remounted for road use, the tire-and-wheel assembly should generally be balanced again. Removing and reinstalling the tire changes its position relative to the wheel, and a new tire has its own weight distribution.
The Bottom Line
The safest way to learn how to take a tire off a rim at home is to use a valve-core tool, a proper bead breaker, two or three rounded tire spoons, rim protectors, and approved lubricant. Remove all air, break both beads, keep the opposite bead in the drop center, and advance the spoons in small increments.
Manual removal works best on ordinary steel wheels and flexible tires. Stop when the assembly involves a split rim, run-flat tire, expensive alloy wheel, severe corrosion, structural damage, or force beyond your equipment and experience.