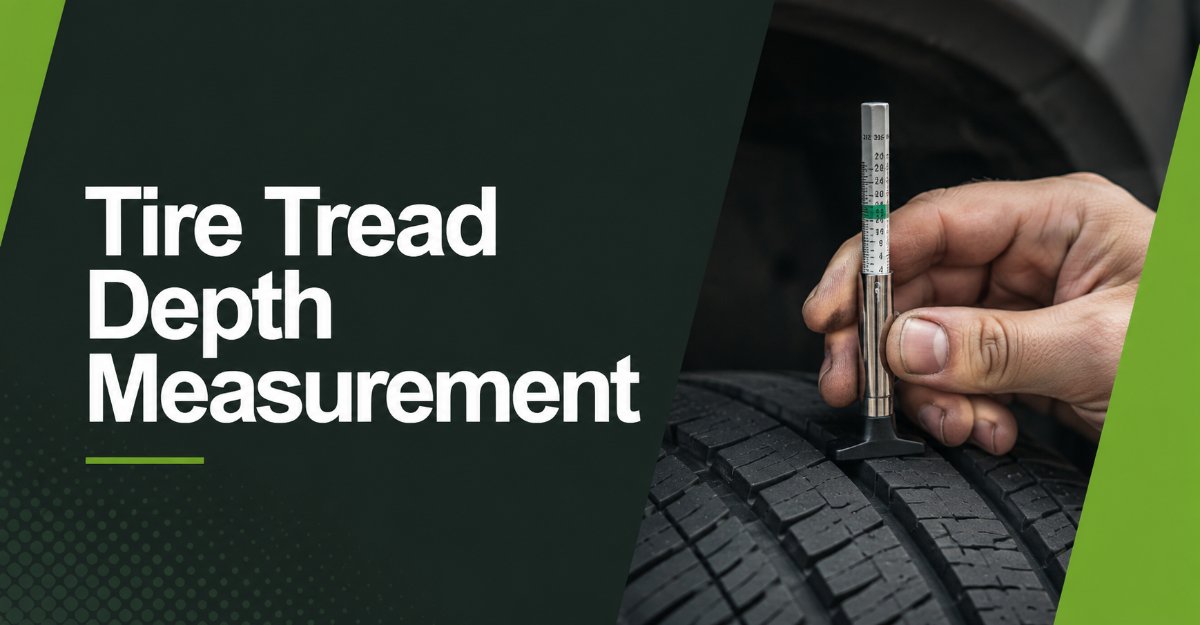
Tire tread depth measurement is the precise vertical calculation of remaining usable rubber on a vehicle tire, measured from the top of the outermost block to the bottom of the deepest structural groove. This vital diagnostic procedure directly dictates a vehicle’s wet weather traction limits, hydroplaning resistance, and overall braking efficiency.
Key Facts / At a Glance
- The absolute legal minimum tread depth worldwide is 2/32 of an inch (1.6 millimeters), requiring immediate replacement.
- Hydroplaning risk increases exponentially once tread depth falls below the critical threshold of 4/32 of an inch (3.2 millimeters).
- Professional measurement requires a three-point scan across the inner, center, and outer circumferential grooves to detect uneven wear.
- Taking a measurement directly on top of a built-in Tread Wear Indicator (TWI) will result in a falsely shallow reading by exactly 2/32 of an inch.
- A depth variance of more than 2/32 of an inch across a single tire footprint strongly indicates failing suspension components or poor wheel alignment.
What Is Tire Tread Depth Measurement?
Tire tread depth measurement is the physical quantification of a tire’s ability to channel water and grip the asphalt. The process involves inserting a calibrated probe into the main circumferential voids of the tire footprint to determine the exact volume of rubber lost to friction over time. The measurement strictly excludes secondary structural elements molded into the channel beds, such as tie-bars, acoustic damping ridges, and regulatory wear indicators.
How Tread Depth Prevents Hydroplaning
Tire tread patterns function as high-speed hydraulic pumps. When a vehicle rolls over a wet surface, the sheer weight of the chassis forces standing water up into the tread grooves. These channels quickly evacuate the fluid out through the sides and rear of the contact patch, allowing the rubber blocks to maintain physical friction with the road.
As tread depth decreases through daily driving friction, the volumetric capacity of these channels shrinks. A brand new passenger tire can evacuate several gallons of water per second at highway speeds. When the depth reaches 4/32 of an inch, the tire simply lacks the physical void space to process the fluid. Water backs up in front of the tire, creating a pressurized wedge of fluid that physically lifts the rubber off the asphalt. This complete loss of mechanical grip is known as hydroplaning, resulting in zero steering or braking control.
What Are the Standard Measurement Numbers?
Tread depth is globally tracked using two dominant measurement systems: 32nds of an inch in the United States, and millimeters (mm) across European and international markets. Automotive technicians rely on these standardized thresholds to determine safety and performance degradation.
| Depth (Imperial) | Depth (Metric) | Safety Status | Operational Reality and Water Evacuation |
|---|---|---|---|
| 10/32″ to 12/32″ | 8.0 mm to 9.5 mm | 🟢 New / Optimal | Factory depth for standard passenger tires. Delivers 100% maximum water evacuation capacity. |
| 6/32″ to 9/32″ | 4.8 mm to 7.1 mm | 🟢 Good | Safe operating range. Braking distances remain predictable on wet and dry surfaces. |
| 5/32″ | 4.0 mm | 🟡 Winter Critical | Minimum threshold for safe snow traction. Tread cannot effectively compress and clear slush below this point. |
| 4/32″ | 3.2 mm | 🟡 Wet Critical | Hydroplaning risk sharply increases. Wet stopping distances double compared to a new tire. |
| 3/32″ | 2.4 mm | 🔴 Extreme Warning | Structural integrity is compromised. Heat dispersion fails. Replacement appointments must be scheduled. |
| 2/32″ | 1.6 mm | ❌ Legally Bald | Regulatory minimum limit. Tires are legally unroadworthy and highly dangerous in any precipitation. |
When Should You Replace Your Tires?
Tire replacement thresholds depend entirely on the operational climate and the vehicle application. You should replace tires at 5/32 of an inch if you live in regions with heavy winter snowfall, as deep voids are mandatory for ejecting packed snow. Drivers in heavy rain climates should replace tires at 4/32 of an inch to maintain safe highway hydroplaning resistance. Drivers in dry, arid climates can safely operate down to 3/32 of an inch before the risk of heat-induced blowouts necessitates replacement. Waiting for tires to reach the legal 2/32 limit is highly discouraged by automotive safety organizations.
Which Measurement Equipment Should You Use?
Accurate data relies on selecting the right diagnostic tool. While visual inspections offer baseline hints, quantifiable safety requires dedicated instruments.
1. Mechanical Pin Gauges (Best for General Drivers)
Mechanical pin gauges utilize a free-sliding metal probe housed inside a calibrated cylindrical sleeve.
- Cost: $3 to $8
- Accuracy: Moderate (subject to visual reading errors)
- Pros: Highly durable, requires no batteries, impervious to extreme shop temperatures, and fits in any glovebox.
- Cons: Small increment lines can be difficult to read in dim wheel wells, and viewing the scale at an angle introduces parallax calculation errors.
- Verdict: Choose this tool for reliable, lifetime use in a personal vehicle, but ensure you buy one with color-coded safety zones for easier reading.
2. Digital LCD Gauges (Best for Precise Tracking)
Digital gauges feature a linear electronic encoder that translates the probe’s physical depth into an exact numerical readout on an LCD screen.
- Cost: $10 to $25
- Accuracy: High (down to 0.01 inches or 0.1 mm)
- Pros: Provides instantaneous numeric data, switches seamlessly between inches and millimeters, and allows zero-calibration at any starting point.
- Cons: Vulnerable to battery failure, and cheap internal sensors can malfunction if exposed to heavy shop solvents or extreme moisture.
- Verdict: Choose a digital gauge if you track wear rates closely over time, but always carry spare button-cell batteries.
3. Handheld Laser Scanners (Best for Fleet and Track)
Laser scanners cast an optical line across the entire tire footprint to generate a comprehensive digital profile of the tread topography.
- Cost: $150 to $1,500+
- Accuracy: Extreme (down to 0.1 mm across the entire width)
- Pros: Instantly maps uneven wear, generates digital alignment reports, and requires mere seconds per wheel.
- Cons: Cost-prohibitive for average consumers and requires routine software updates and careful optic lens cleaning.
- Verdict: Choose laser profiling exclusively for commercial fleet management or professional motorsport applications where alignment data dictates profit or lap times.
The Problem with Coin Intercept Tests
Using a coin (like a US Penny or a UK 20p piece) is a common roadside tactic. Placing Washington or Lincoln’s head down into the groove gives a rough visual estimate of the 2/32 inch legal limit. However, this method is fundamentally flawed for diagnostic purposes. The coin test is entirely subjective, yields no exact fractional data, and is physically too large to fit into narrow shoulder sipes. More importantly, it fails completely at detecting early, millimeter-level uneven wear that warns of impending suspension failure.
How to Measure Tire Tread Depth
Capturing accurate tread data requires a standardized, repeatable procedure. Taking a single measurement in the center of the tire provides an incomplete picture of the vehicle’s safety profile.
Before You Start
- Time Required: 3 to 5 minutes total.
- Tools Required: A calibrated mechanical or digital tread depth gauge, a flashlight, and a small flathead screwdriver.
- Prerequisites: The vehicle must be parked on a level surface with the engine off and the electronic parking brake fully engaged.
Step 1: Prepare the Steering Angle
Turn the steering wheel entirely to full left lock or full right lock. This pushes the front tire face outward past the fender line, allowing direct visual access to the entire tread block. You will know this step is complete when you can clearly see the inner, center, and outer grooves of the front tires without kneeling awkwardly under the vehicle.
- Common Mistake: Attempting to measure front tires while they are pointed straight ahead. This forces you to measure blindly by feel, leading to inaccurate tool placement.
Step 2: Clear the Channels
Inspect the main circumferential grooves (the deep lines running all the way around the tire). Use your small flathead screwdriver to carefully pry out any gravel, compacted dirt, or glass wedged into the bottom of the rubber valleys.
- Common Mistake: Pushing the measuring probe directly onto a small stone. This stops the probe early and falsely registers the tire as being dangerously bald.
Step 3: Locate and Avoid the Wear Bars
Scan the cleared grooves with your flashlight to identify the Tread Wear Indicators (TWIs). These are small, raised rectangular bumps molded horizontally across the bottom of the main grooves. They sit exactly 2/32 of an inch above the actual base of the tire. Ensure your measurement zone is at least two inches away from any TWI bump.
- Success Checkpoint: The base of your tool should rest flat on the upper tread block, while the needle drops freely into a completely empty section of the groove.
Step 4: Execute the Three-Point Scan
Press the base of the gauge completely flat against the top surface of the tire. Push the probe down until it bottoms out in the structural groove. Record the measurement. You must repeat this action in three distinct zones across the exact same horizontal line of the tire: the inner shoulder groove, the exact center groove, and the outer shoulder groove.
- Common Mistake: Applying too much downward force. Pushing hard compresses the upper rubber blocks and flexes the internal tire casing, which artificially deepens the reading and creates bad data.
Step 5: Roll and Repeat
Once the three-point scan is logged, start the vehicle and roll it forward roughly two feet. Repeat the three-point scan on this newly exposed section of the tire. Repeating the measurement on a different circumferential axis ensures you catch localized flat spots caused by emergency braking lock-ups. Record the absolute lowest number you find as your official tread depth for that tire.
Why Does Uneven Tread Wear Occur?
If your three-point scan reveals different numbers across a single tire face, your vehicle has a mechanical defect. Tread depth measurement is not just about tire life; it is a direct diagnostic window into the health of your chassis.
Center Wear: If the centerline groove measures significantly lower than the inner and outer shoulders (for example, reading 4/32 in the center but 7/32 on the edges), the tire is drastically overinflated. The excessive air pressure causes the center of the tire to bulge outward, bearing the entire weight of the vehicle and burning away the rubber prematurely.
Edge Wear: If both the inner and outer shoulders measure lower than the center groove, the tire is underinflated. Low pressure allows the center of the tread to collapse slightly inward, forcing the rigid sidewalls and shoulders to scrub violently against the asphalt.
Asymmetrical Shoulder Wear: If the inner groove measures 3/32 but the outer groove measures 7/32, the vehicle has a severe wheel alignment failure. The camber angle is heavily skewed, forcing the tire to lean inward and drag across the pavement. Any variance greater than 2/32 of an inch across a single tire footprint requires immediate suspension diagnosis by a certified mechanic to prevent ruining the next set of tires.
Frequently Asked Questions
Do front and rear tires wear at the same rate?
No. Front tires almost always wear faster on standard commuter vehicles because they handle the vast majority of steering friction, cornering loads, and braking weight transfer. Regular tire rotation equalizes this discrepancy, which is why taking depth measurements on all four corners before rotation is essential.
How accurate are the tread wear indicator bars?
Tread Wear Indicators are perfectly accurate for identifying the legal minimum limit. They are molded precisely 2/32 of an inch (1.6 mm) above the structural casing. When the main tread blocks wear down flush with these indicator bars, the tire is legally bald and structurally unsafe for wet conditions.
Can I measure tread depth without a dedicated tool?
You can generate a rough estimate using a standard coin, but automotive professionals advise against it for safety determinations. Coins lack millimeter precision, fail to identify specific uneven wear profiles, and cannot accurately tell you when a tire reaches the critical 4/32 inch hydroplaning threshold.
Does temperature affect tread depth readings?
Temperature does not change the physical volume of the missing rubber, but extreme cold causes tire air pressure to drop significantly. Measuring a severely underinflated tire can slightly alter the contact patch geometry and compress the shoulder blocks, which may yield marginally skewed measurements if you push down too hard with the gauge.
What are the tiny ridges inside the grooves that are not wear bars?
Those are acoustic damping channels. Tire engineers mold tiny rubber fins into the bottom of the grooves to break up wind resonance and reduce highway road noise. You must avoid placing your measurement probe on top of these ridges, just as you avoid the primary wear indicator bars.