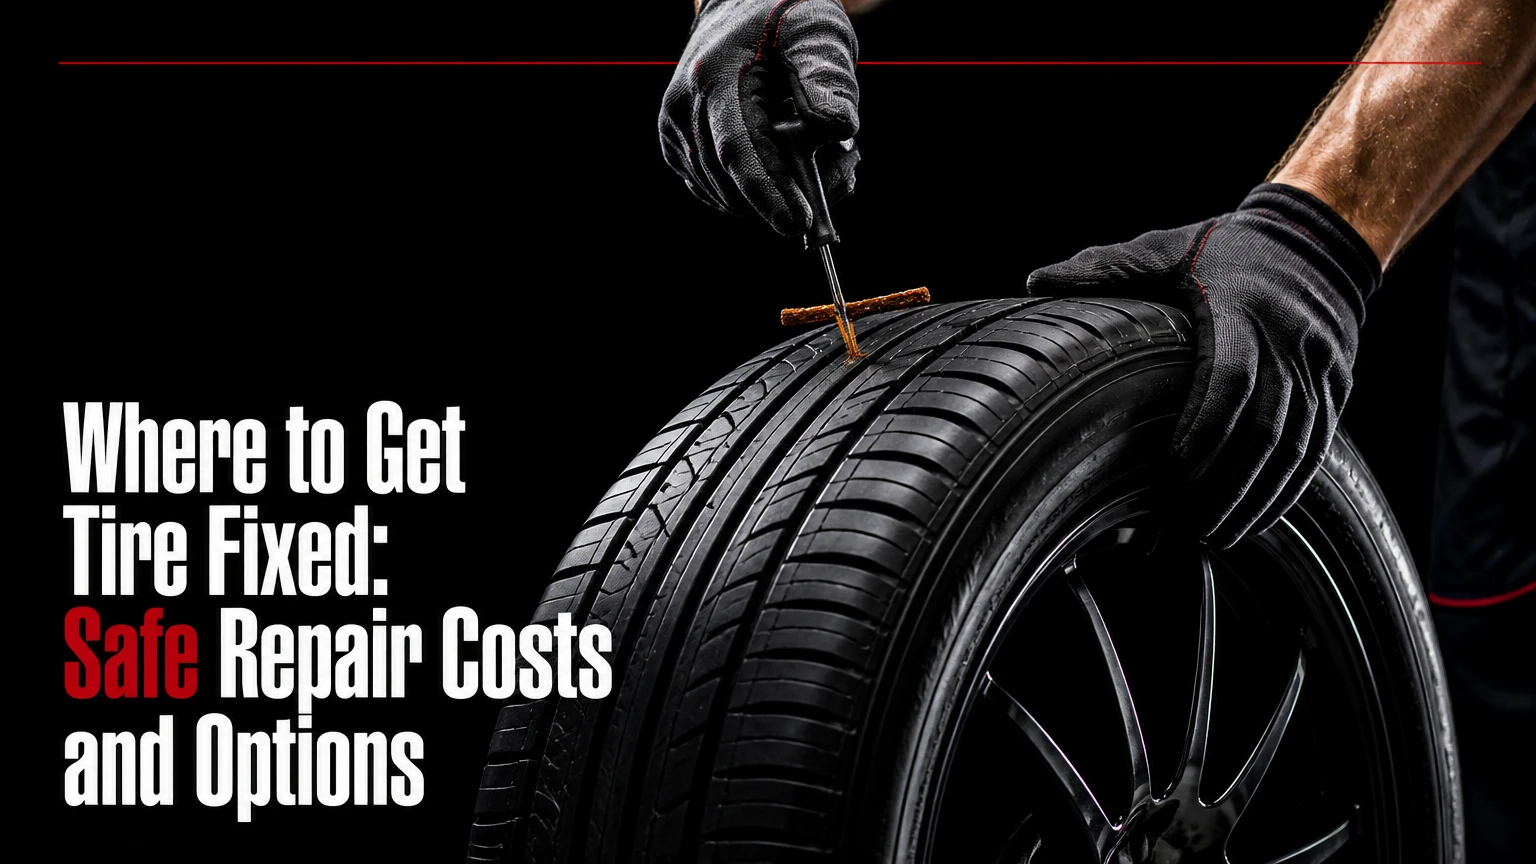
You can get a tire fixed at a tire chain, independent auto repair shop, tire retailer, dealership, or mobile tire service. For a puncture that is 1/4 inch or smaller in the central tread, the safest permanent solution is usually an internally inspected combination patch-plug, which typically costs $25-$65 and takes 30-60 minutes.
Key facts at a glance
A repairable puncture is usually 1/4 inch, or 6 mm, or smaller and located in the repairable tread area.
A permanent puncture repair requires an internal inspection and normally combines a plug or stem with an innerliner patch.
Sidewall, shoulder, bead, severely worn, heat-damaged, and run-flat damage often requires tire replacement.
A tire chain may repair a flat free under its road-hazard or customer-service policy, but policies vary by location and purchase history.
Typical shop repair prices range from $25-$65; mobile technicians commonly add a $50-$120 call-out fee.
Do not drive on a visibly flat tire unless the vehicle and tire manufacturer specifically permit limited run-flat travel.
Where can you get a tire fixed?
The best place to get a tire fixed is a dedicated tire center or reputable independent repair shop that removes the tire for an internal inspection. A mobile tire service is useful at home, work, or a safe roadside location, while a dealership is most appropriate for specialized tires, original-equipment fitments, or vehicles with unusual TPMS and AWD requirements.
Call before arriving. Ask whether the shop performs an inside-out patch-plug repair, whether it repairs tires purchased elsewhere, whether appointments are required, and what happens if inspection reveals sidewall or internal damage.
| Service venue | Typical repair price | Typical wait or service time | Best use |
|---|---|---|---|
| National tire chain | $0-$65 | 30-120 minutes | Standard punctures, tire warranties, replacement inventory |
| Independent repair shop | $25-$75 | 30-90 minutes | Diagnosis, bead leaks, rim problems, mixed vehicle repairs |
| Mobile tire service | $75-$185 total | 30-90 minutes onsite | Home, office, or safe roadside assistance |
| Vehicle dealership | $35-$100 | 1-3 hours | OEM tires, specialized vehicles, warranty documentation |
| Roadside assistance | $50-$150 dispatch | 30-120 minutes | Inflation, spare installation, towing, emergency recovery |
National chains such as Discount Tire, Firestone Complete Auto Care, Les Schwab, Mavis, and Big O Tires may offer free flat repairs under specific policies. Free service is not a universal entitlement, however. A shop can refuse a repair when the tire is unsafe, the puncture is outside the repairable area, or the tire was driven while severely underinflated.
What should you ask before visiting a tire shop?
Ask four direct questions: “Do you dismount the tire to inspect the inside?” “Do you use a combination patch-plug?” “What is the total price if the tire cannot be repaired?” and “Will you check the valve, bead, and rim if the puncture is not the leak source?”
A competent shop should explain the diagnosis rather than promise a repair before seeing the tire. The technician should also identify tread depth, tire age, previous repairs, and any internal abrasion from driving underinflated.
What should you do before getting a tire fixed?
Stop driving if the tire is visibly flat, rapidly losing pressure, damaged on the sidewall, or producing vibration, pulling, flapping, or scraping sounds. Inflate the tire only to the vehicle door-jamb pressure if the damage is limited to a small tread puncture and the tire has not been driven flat.
Use the vehicle’s spare tire, tire inflation kit, or roadside assistance when the tire cannot safely hold air. Park away from traffic, activate hazard lights, and never kneel beside a damaged tire on a narrow highway shoulder when a tow or mobile technician can reach you.
Do not remove a nail or screw before the tire is assessed. The object may be slowing the leak, and removing it can cause a rapid pressure loss.
Can your tire be repaired?
A tire can generally be repaired when the puncture is 1/4 inch, or 6 mm, or smaller, lies within the central tread, has not damaged the internal structure, and is not too close to another repair. The tire must also have sufficient tread and must not show evidence of being driven severely underinflated.
The U.S. Tire Manufacturers Association describes the accepted principle directly: “A proper tire repair is a two-piece repair that consists of a rubber stem or plug to fill the puncture hole and a patch to seal the innerliner.” The Tire Industry Association and tire manufacturers use similar safety guidance, although specific limits and procedures can differ by tire design.
The 1/4-inch threshold is a widely used industry limit, not a blanket statement that every 6 mm puncture is legal to repair in every jurisdiction. A tire manufacturer’s repair manual, the tire’s speed rating, commercial-use requirements, and local regulations can impose stricter conditions.
Damage that usually requires replacement
| Damage condition | Repair decision | Main reason |
|---|---|---|
| Sidewall cut or puncture | Replace tire | Sidewall flex prevents a dependable permanent repair |
| Shoulder puncture | Usually replace | Repair area extends into a high-flex transition zone |
| Tread puncture over 1/4 inch | Usually replace | Excessive material removal weakens the belt package |
| Visible cords, bulge, or separation | Replace immediately | Structural failure cannot be restored with a patch |
| Tread below 2/32 inch | Replace | Legal and hydroplaning limits may apply |
| Run-flat driven beyond maker limit | Inspect, often replace | Heat damage may remain hidden internally |
| Two repairs overlapping | Replace | The repaired structure has insufficient separation |
| Tire driven flat with abrasion inside | Replace | Innerliner and sidewall heat damage can cause failure |
A tire with a puncture near the shoulder is a common borderline case. The technician may reject it even when the hole itself is small because the repair patch would sit in an area that flexes too aggressively.
How does a professional tire repair work?
A professional tire puncture repair normally takes 30-60 minutes because the technician must remove the tire, inspect its interior, prepare the rubber, install a combination repair unit, and test the finished assembly. The repair succeeds only when the puncture channel and innerliner are both sealed.
Step 1: Remove the tire and inspect it
The technician dismounts the tire from the wheel and examines the innerliner, bead, sidewalls, and belt area. Gray-black abrasion dust, exposed cords, shredded rubber, or a circumferential crease indicates that the tire may have been driven underinflated.
You will know this step was completed when the technician can show or describe the inside of the tire. A repair performed without removing the tire cannot reveal hidden internal damage.
Common mistake: accepting an outside plug as a permanent repair without asking for an internal inspection.
Step 2: Prepare the puncture channel
The technician removes the nail or screw, identifies the entry angle, and cleans the channel. A low-speed carbide cutter may be used to remove damaged rubber and create a consistent path for the repair stem.
The channel should follow the original penetration path rather than being drilled at an arbitrary angle. Incorrect preparation can distort the repair unit or enlarge the injury unnecessarily.
Step 3: Buff and clean the innerliner
The innerliner around the injury is lightly buffed to remove contamination and create the texture needed for chemical bonding. The technician then removes dust and applies the specified vulcanizing cement or chemical solution.
Aggressive high-speed buffing can generate heat and remove too much rubber. Professional repair procedures specify controlled tools because the innerliner is an airtight barrier, not merely a cosmetic surface.
Step 4: Install the combination patch-plug
The stem fills the puncture channel from the inside outward, while the patch covers the prepared innerliner. The technician pulls the stem through until the patch sits flat, then presses the patch from the center toward its edges to remove trapped air.
A proper patch-plug seals two separate leak paths. The stem closes the physical hole, and the patch restores the airtight innerliner.
Step 5: Seal, trim, inflate, and test
The technician applies the specified innerliner sealer, trims the external stem flush with the tread, inflates the tire to operating pressure, and checks for leakage. The wheel may then be balanced before installation.
You will know the repair passed when the assembly holds pressure during a leak test and the vehicle does not develop a new vibration. A pressure reading alone does not prove that the tire is safe.
Which tire repair method is safest?
An internally installed combination patch-plug is the safest standard repair for an eligible passenger-car tread puncture. An outside-in rope plug is a useful emergency measure, but it does not replace the inspection and innerliner sealing required for a permanent repair.
| Repair method | Typical cost | Typical time | Appropriate use | Main limitation |
|---|---|---|---|---|
| Combination patch-plug | $25-$65 | 30-60 minutes | Eligible tread puncture | Requires tire removal and trained equipment |
| External rope plug | $5-$20 DIY | 5-15 minutes | Temporary roadside mobility | No internal inspection or innerliner patch |
| Flat patch alone | $20-$40 | 20-40 minutes | Generally not preferred for modern tubeless tires | Does not fill the puncture channel |
| Liquid sealant | $10-$25 | 5-15 minutes | Emergency trip to a repair facility | May affect TPMS and complicate inspection |
| Tire replacement | $100-$400+ | 45-120 minutes | Unsafe or non-repairable damage | Higher cost and possible axle matching |
The Tire Industry Association warns that a plug alone is not a complete repair because it does not seal the inner surface. A shop that installs an external plug may be providing a temporary service, not the permanent repair a daily highway driver should request.
Why are tire sealants limited?
Liquid sealants can temporarily slow a small leak, but they are not a structural repair and cannot correct sidewall damage, belt separation, or a large cut. Some formulas interfere with tire-pressure monitoring sensors, create cleanup problems, and have speed or distance limits printed on the product label.
Use sealant only when the product is compatible with the tire and vehicle, the label permits the intended application, and the vehicle is driven directly to a repair facility. Tell the technician that sealant was used.
How much does it cost to get a tire fixed?
A standard tire puncture repair typically costs $25-$65 at a tire shop in the United States, while an independent garage may charge $25-$75 and a mobile technician may charge $75-$185 after travel fees. A replacement passenger tire commonly costs $100-$400 or more, depending on size, brand, performance rating, and installation charges.
Prices vary by region and by whether the tire was purchased from the provider. Taxes, disposal, mounting, balancing, valve replacement, TPMS service, and road-hazard coverage may appear separately.
| Service or added charge | Typical range | What changes the price |
|---|---|---|
| Basic puncture repair | $25-$65 | Chain policy, tire origin, local labor rate |
| Mobile call-out fee | $50-$120 | Distance, time of day, roadside location |
| Valve stem replacement | $10-$35 | Rubber valve versus TPMS service kit |
| Wheel balance | $15-$35 per wheel | Weight amount, wheel condition |
| Bead leak repair | $30-$100 | Corrosion, rim cleaning, sealant work |
| Passenger tire replacement | $100-$400+ | Tire size, load rating, performance category |
| Towing to a shop | $75-$200+ | Distance, membership, emergency timing |
A free repair policy does not mean the shop will repair every tire. Policies commonly exclude commercial vehicles, tires bought elsewhere, unsafe damage, and repairs outside the manufacturer’s limits.
Which service venue should you choose?
Choose a dedicated tire center for a normal tread puncture, an independent shop for a complicated leak or rim problem, a mobile technician for a stranded vehicle in a safe location, and a dealership for specialized original-equipment or manufacturer-covered work.
| Driver situation | Best first choice | Why | Avoid when |
|---|---|---|---|
| Daily highway commuter | Dedicated tire center | Repair equipment, balancing, replacement inventory | The shop cannot provide internal inspection |
| Budget-conscious owner | Chain with purchase history | Free or low-cost repair policies may apply | The policy excludes the tire or damage |
| Rural driver without a spare | Mobile service | Prevents an unsafe long-distance drive | The vehicle is on a dangerous highway shoulder |
| AWD or specialty vehicle owner | Dealer or tire specialist | Correct fitment and axle-matching advice | The facility lacks the required tire size |
| Corroded wheel or recurring leak | Independent repair shop | More diagnostic time for bead and rim issues | The shop only offers external plugs |
| Tire with sidewall damage | Tow or mobile replacement | Replacement is safer than repair | Anyone offers a sidewall patch as permanent |
An honest limitation matters here: no service venue can determine repairability from a photograph alone. A photo can show the puncture location, but internal abrasion, belt damage, and the tire’s full condition require a hands-on inspection.
What causes a tire to keep losing air?
A tire that repeatedly loses pressure may have a tread puncture, leaking valve core, damaged TPMS valve, corroded bead seat, bent wheel, cracked rim, or internal structural damage. Finding the leak source matters because repeatedly plugging the tread will not fix a valve or wheel problem.
Spray a mixture of dish soap and water around the tread, valve stem, valve core, and rim edge while the tire is inflated. Growing bubbles identify an escaping-air path, but do not place hands near a damaged tire while inflating it.
Tread puncture
A nail or screw in the tread often creates a slow leak. Leave the object in place, add air only if the tire remains structurally intact, and drive directly to a shop or request mobile service.
Valve or TPMS leak
Bubbles at the valve core or sensor grommet indicate a valve-related leak. The shop may replace the valve core, rubber grommet, or complete TPMS service kit rather than repairing the tread.
Bead or rim leak
Bubbles around the wheel circumference usually indicate corrosion, dirt, a damaged bead, or a bent rim. The technician must dismount the tire, clean or repair the wheel, and reseal the bead.
What mistakes make tire repairs unsafe?
The most damaging mistake is driving on a tire after pressure has fallen substantially. Even a repairable nail puncture can become an unrepairable tire when the sidewall folds against the road and generates heat.
Avoid these failure patterns:
- Using a rope plug as the final repair: request an internal inspection and patch-plug instead.
- Repairing the sidewall or shoulder: replace the tire because flexing rubber can reopen the injury.
- Ignoring tread depth: a puncture repair does not restore worn tread; replace a tire at or below 2/32 inch.
- Skipping the leak test: verify pressure retention before leaving the shop.
- Ignoring vibration after repair: return for balance and wheel inspection.
- Applying sealant without disclosure: residue can mask leaks and delay accurate diagnosis.
- Replacing one tire on an AWD vehicle without checking limits: tread-depth differences can stress driveline components.
A repair also should not overlap an earlier repair. There is no universal 16-inch separation rule that applies to every passenger tire; manufacturers specify minimum spacing, and the technician must evaluate the actual injury pattern.
Repair or replacement: Which is the better decision?
Repair the tire when the injury is a small, isolated center-tread puncture and the tire passes internal inspection. Replace the tire when damage reaches the sidewall or shoulder, the tire has been driven flat, tread is worn, the injury is too large, or the tire has structural symptoms such as a bulge or separation.
Before accepting a replacement, compare the new tire’s size, load index, speed rating, traction category, and tread depth with the other tires. On AWD vehicles, consult the owner’s manual because some manufacturers limit allowable circumference differences between tires.
A tire that is only a few months old may justify matching a single replacement. A nearly worn axle may make replacing two tires more practical, with the deeper-tread pair installed according to the vehicle manufacturer’s instructions.
How do you verify a tire repair before leaving?
Confirm that the tire holds the vehicle manufacturer’s cold inflation pressure, the valve does not leak, the wheel is properly mounted, and the repair location is documented if the shop provides paperwork. Ask whether the tire was balanced and whether the shop gives a workmanship or road-hazard warranty.
Use this five-point check:
- Confirm the repaired tire’s position and final pressure.
- Ask whether the inside showed abrasion, cords, or heat damage.
- Verify that the external stem was trimmed flush.
- Check that the TPMS warning has cleared after driving.
- Return immediately for persistent vibration, pressure loss, pulling, or noise.
A repaired tire should still be checked monthly when cold and before long trips. The National Highway Traffic Safety Administration recommends regular tire-pressure checks, and the vehicle placard, rather than the number molded into the tire sidewall, supplies the correct everyday pressure.
Frequently Asked Questions
Can I drive to a tire shop with a nail in my tire?
You can usually drive a short distance to a tire shop when the nail remains in the central tread, the tire is holding pressure, and the vehicle shows no vibration or handling change. Inflate only to the door-jamb specification, avoid highways, and stop if pressure falls quickly. A roadside technician is safer when the tire is visibly flat.
Will a tire shop fix a tire for free?
Some chains repair eligible flat tires for free when the tires were purchased there or covered by a road-hazard plan. Free service depends on the location, policy, tire condition, and damage type. Ask for the store’s current policy before assuming that a free inspection includes a free permanent repair.
How long does a patched tire last?
A correctly installed combination patch-plug can last for the remaining usable life of the tire when the tire was eligible, properly inspected, and maintained. Longevity depends on tread wear, inflation, load, speed, tire age, and subsequent damage. An external rope plug should be treated as temporary until a shop performs a permanent repair.
Can a tire be fixed without removing it from the wheel?
An external plug or liquid sealant can be installed without removing the tire, but neither method provides the internal inspection required for a dependable permanent repair. A professional combination patch-plug requires dismounting the tire so the technician can examine the innerliner and seal it from inside.
Should I use Fix-a-Flat before calling a tire shop?
Use an aerosol sealant only when the product instructions allow it and the goal is to reach a repair facility. Sealant cannot repair sidewall or structural damage, may affect TPMS components, and leaves residue inside the tire. Tell the technician which product and quantity you used.
Where to get tire fixed if the tire is completely flat?
Call a mobile tire service, roadside assistance provider, or towing company when the tire is completely flat and no safe spare-tire change is available. Do not drive on it to a shop, because the wheel can crush the sidewall and turn a repairable tread puncture into a replacement.
The Bottom Line
The safest answer to where to get tire fixed is a reputable tire center or independent repair shop that removes the tire and performs an internal inspection. For an eligible center-tread puncture, request a combination patch-plug, expect roughly $25-$65, and allow 30-60 minutes. If the damage reaches the sidewall, shoulder, bead, or internal structure, replacement is safer than any patch or plug.